Optimizing your Zoom Recordings
There are tons of settings under the hood on how to optimize your Zoom session recordings. This page will guide you through how to turn them on. Alternatively, here is a short video walkthrough as well.
Note: You'll have to be the meeting creator in order for this to work!
- Start by going to harvard.zoom.us.
- Click Settings in the panel on the left, then click Recording.
That will open a big panel that looks like this:
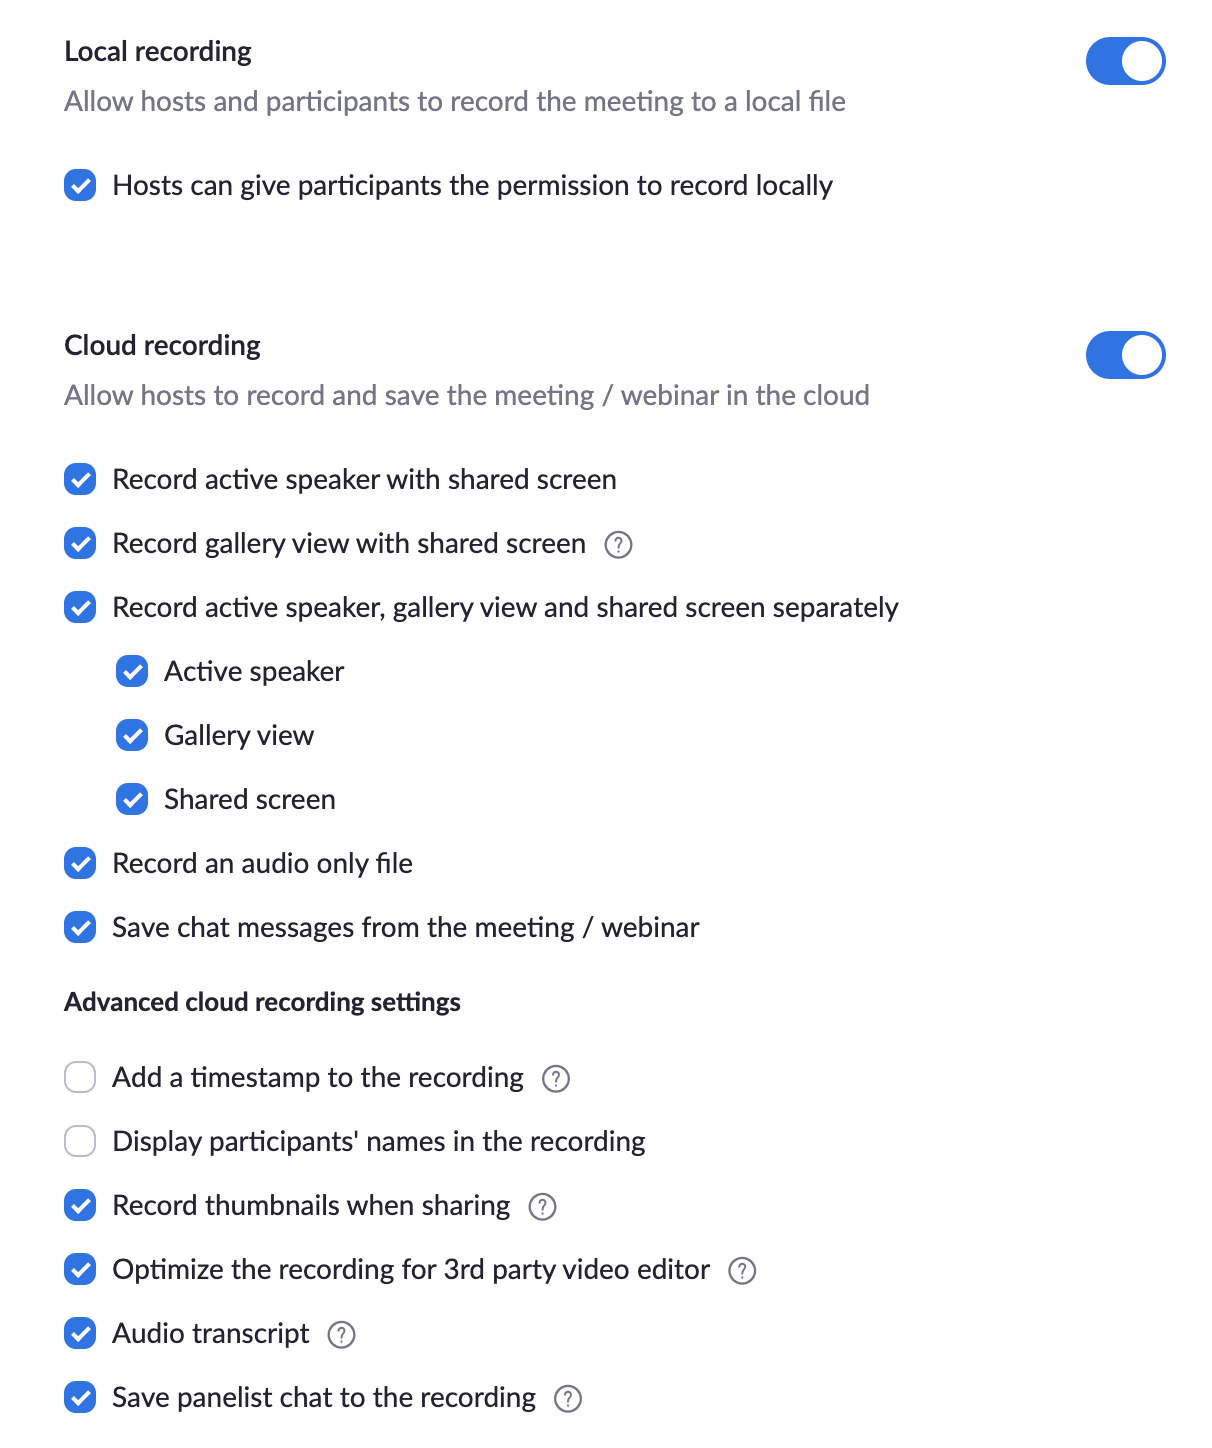
- You're going to want to go wild clicking all of these boxes except "Display participants' names in the recording" and "Add a timestamp to the recording". This will make sure you have all of the possible recordings for any meeting you are hosting.
For accessibility's sake, here's a typed list of all of the options you'll want to select:
Cloud recording
- Allow hosts to record and save the meeting / webinar in the cloud (yes)
- Record active speaker with shared screen (yes)
- Record gallery view with shared screen (yes)
- Record active speaker, gallery view and shared screen separately (yes)
- Active speaker (yes)
- Gallery view (yes)
- Shared screen (yes)
- Active speaker (yes)
- Record an audio only file (yes)
- Save chat messages from the meeting / webinar (yes)
Advanced cloud recording settings
- Add a timestamp to the recording (NO)
- Display participants' names in the recording (NO)
- Record thumbnails when sharing (yes)
- Optimize the recording for 3rd party video editor (yes)
- Audio transcript (yes)
- Save panelist chat to the recording (yes)