The Histogram in Lightroom classic
What Does It Tell Us
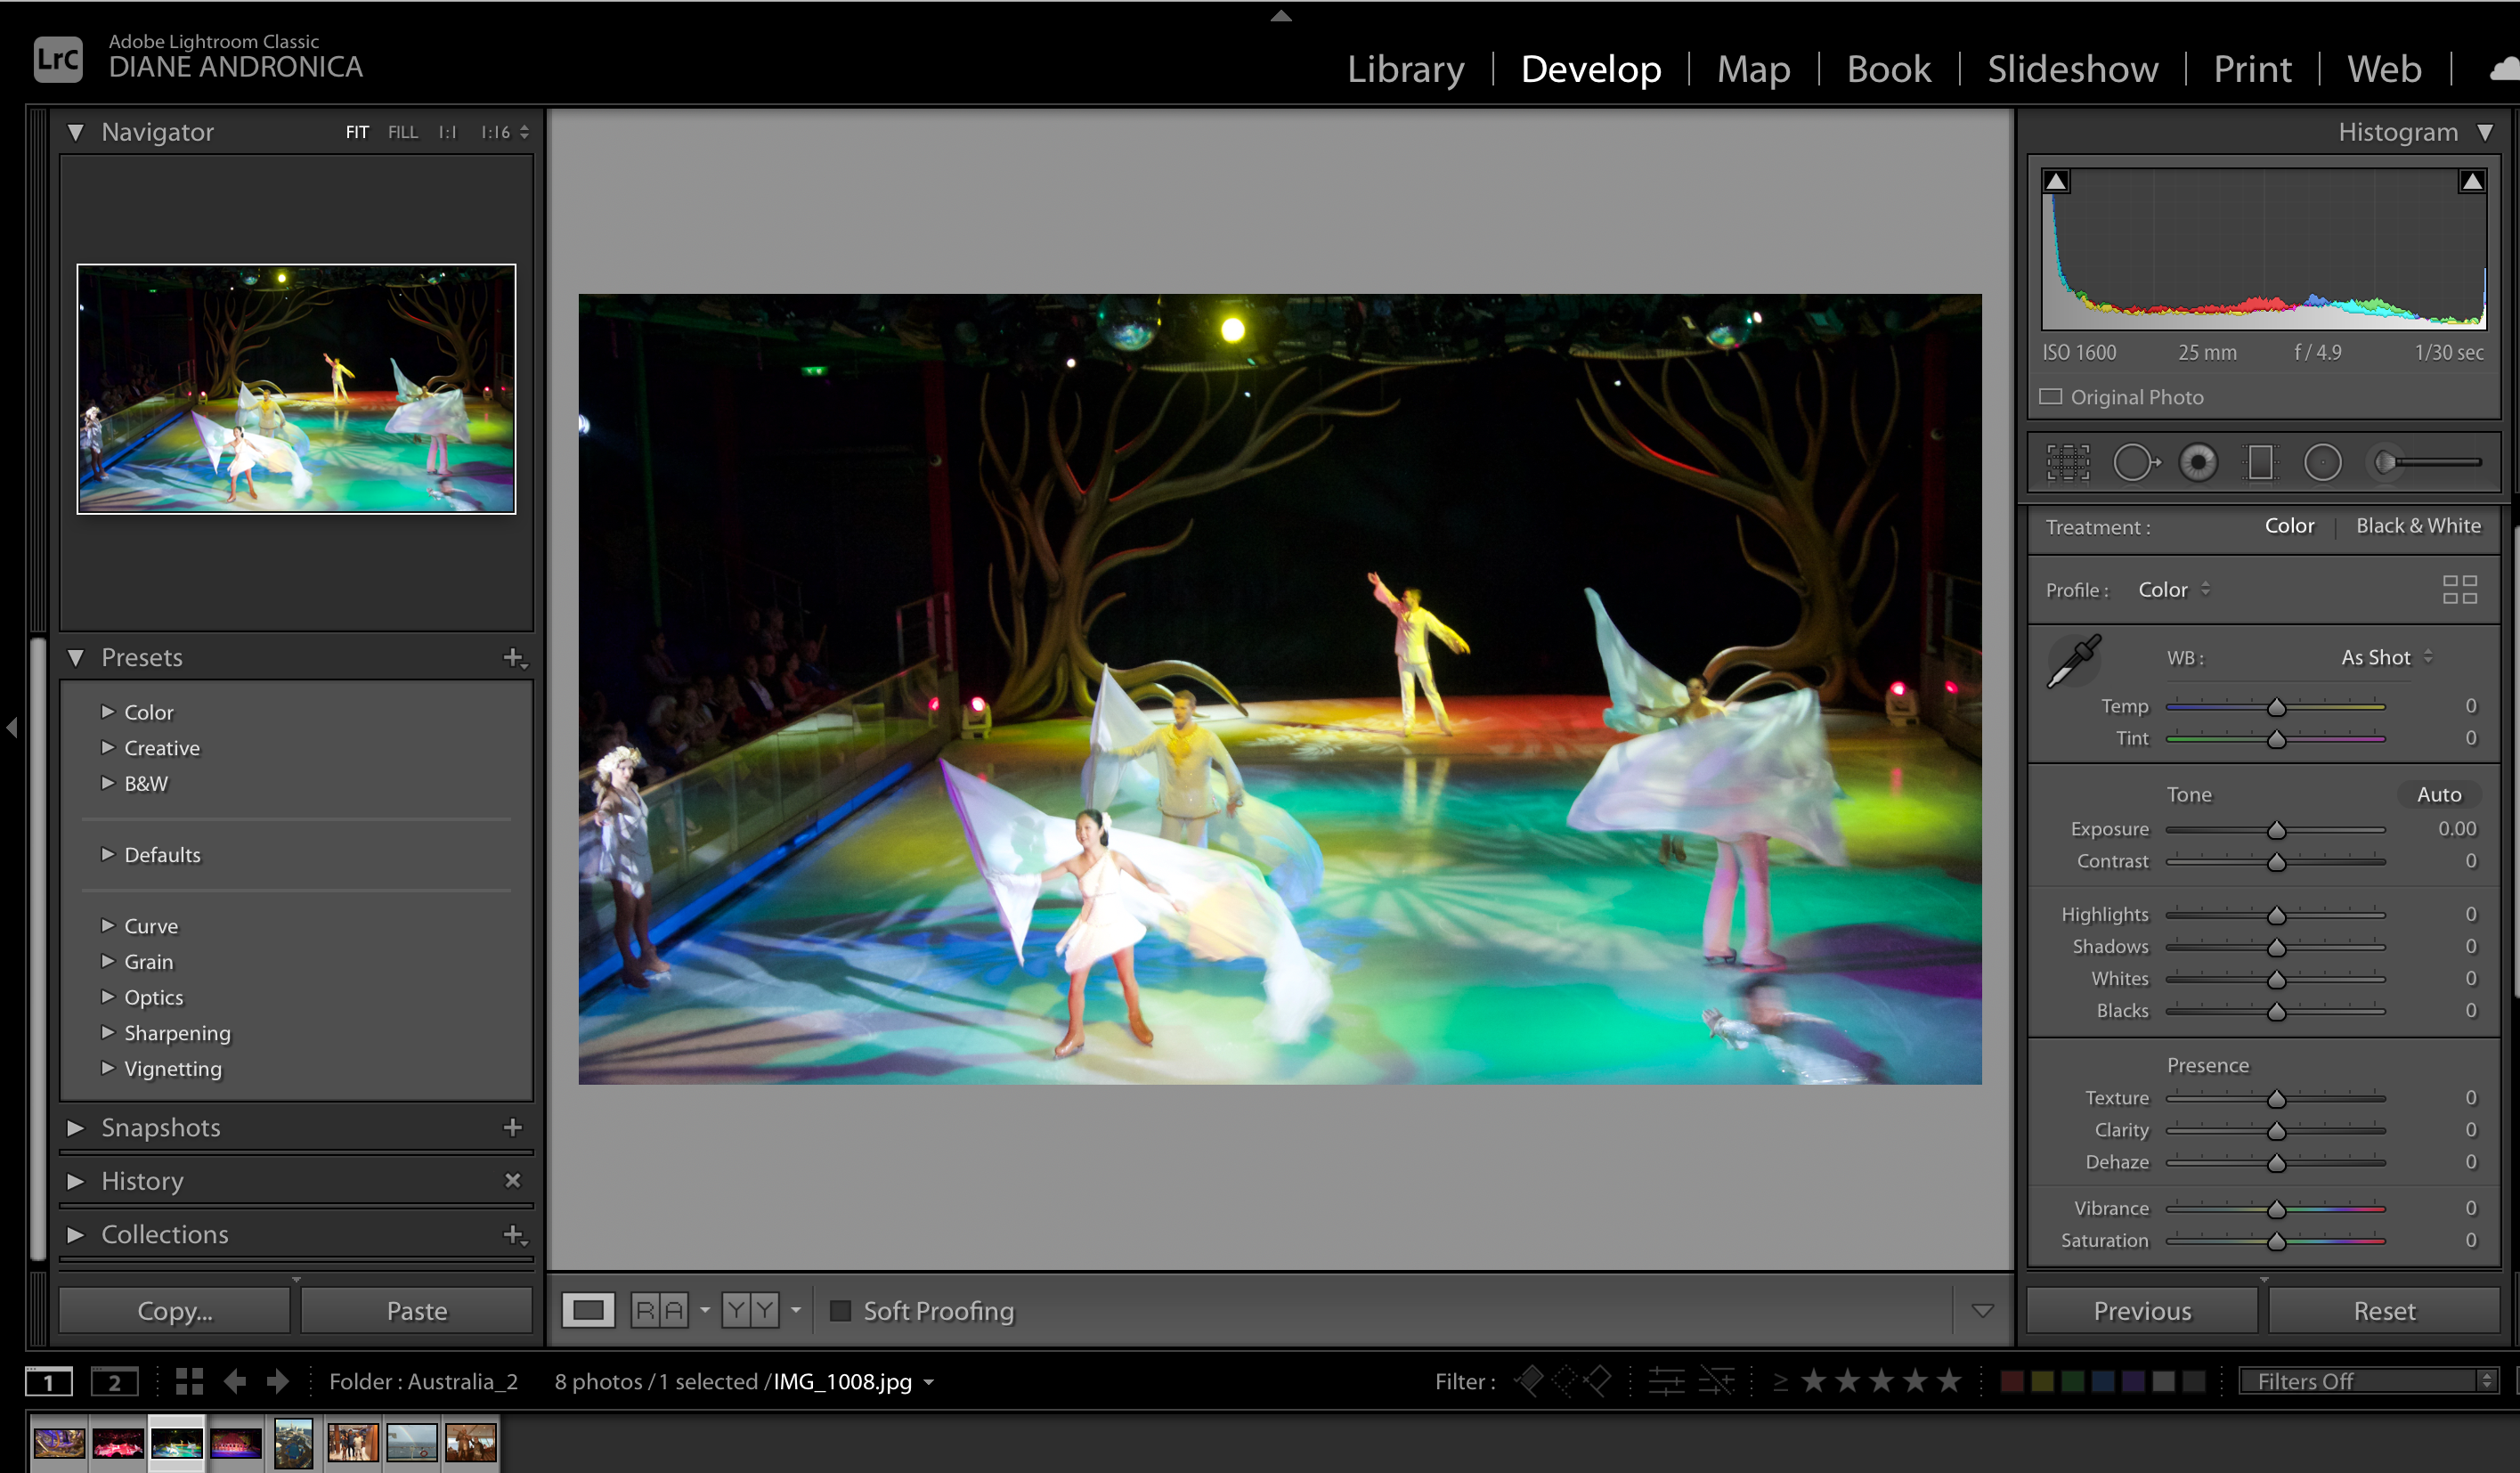
A Histogram is a graph of different tones in your image and gives us information about the exposure range of our image from blacks to whites and everything inbetween. It allows you to adjust the blacks, shadows, exposure, highlights and whites of your image. It is found in the upper right hand corner of the screen
When the Develop Module is selected, you can edit images in great detail.
The left hand column has some presets and also a history list option if you need to back up from what you did
The right hand column lists multiple ways you can manipulate your images

Opening the Basic disclosure triangle in the right hand column offers many ways to manipulate the image. In the Develop Module you can only work on one image at a time, but since they are still listed in the filmstrip for the folder you selected, you can change which file appears

You can adjust the blacks, shadows, exposure, highlights and whites in your image by dragging on the histogram directly. The corresponding adjustment sliders in the Basic drop down list will match your movements and you can see how your image is affected
You can also make adjustments with the sliders. The Histogram and image will reflect the changes
Clipping
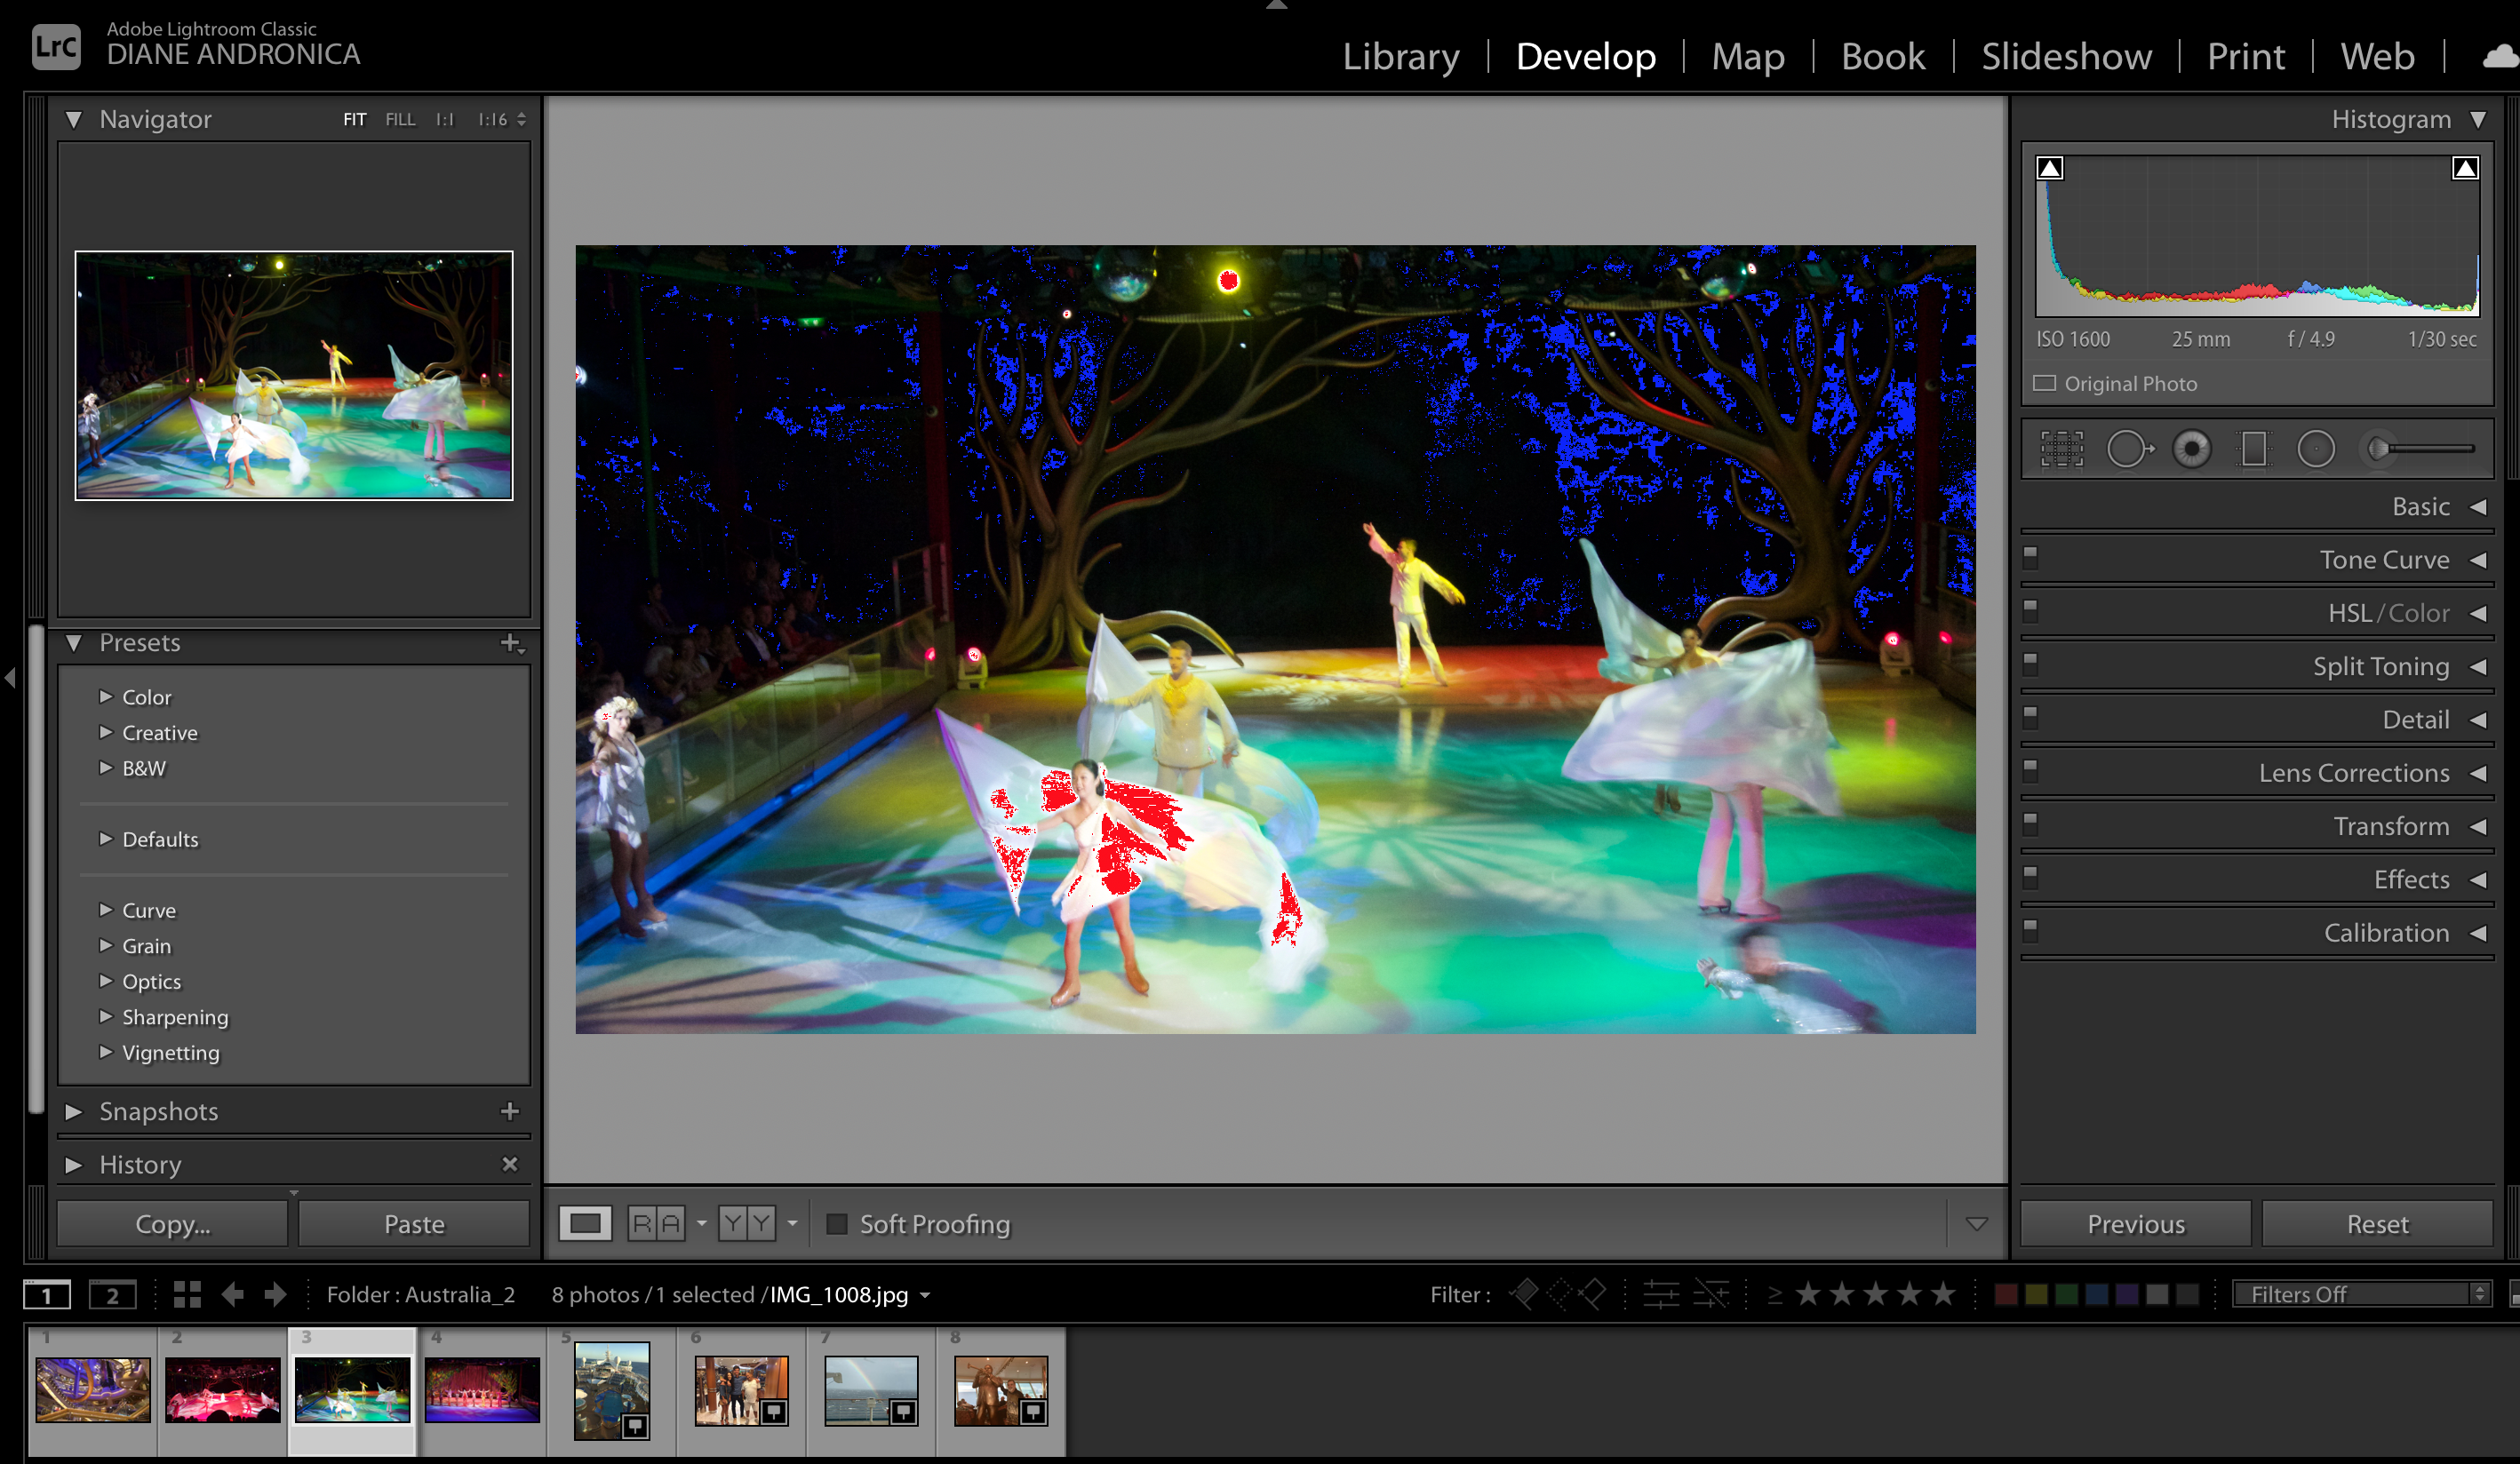
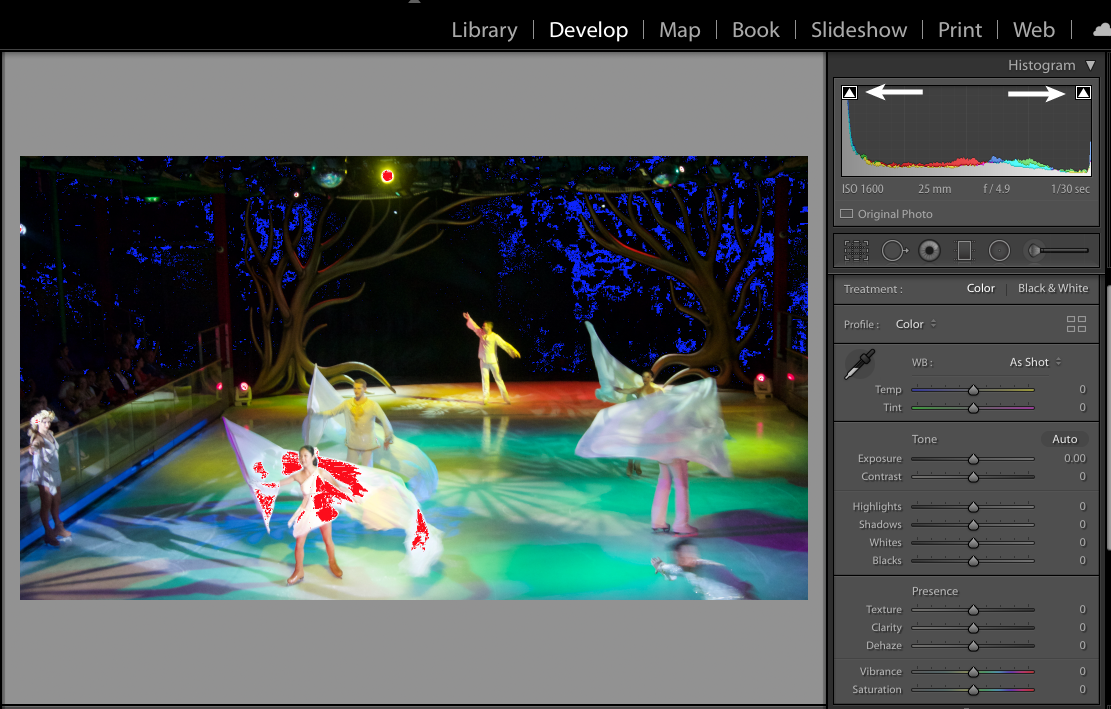
In photography and video, clipping refers to certain areas that fall outside the minimum and maximum intensity that can be captured. In other words, there isn't any information in that part of the image. Lightroom represents these areas with blue for black clipping and red for white clipping. The two triangles on the top corners of the histogram show these areas when selected.

Selecting the triangles shows the areas that are affected
If you decide you want to delete your changes, you can click the Reset button