Capturing Video for Presentations
Powerpoint
Recording presentations on Powerpoint is very simple! Either follow the steps below or check out the video tutorial to record your presentation.
To Record:
Select Slide Show > Record Slide Show
Choose either to: a. Record from Current Slide (if you want to choose a specific slide to start with) b. Record from Beginning (if you want to record from the beginning of your slide deck)
Once you’re ready, select Record and you can begin to speak!
Note: When you’re transitioning slides, narration won’t record. Remember to narrate your slides once you’re on the slide.
Controls:
- Pause - pause the recording
- Stop - end the recording
- Replay - replay the recording
- Pen, Highlighter, or Eraser - use the pen, highlighter, or eraser tools to mark up your recording
Remove narration of timings:
- If you’re already in record mode, select Clear.
- Choose to either: a. Clear Recording on Current Slide (this will delete narration and timings on the current slide) b. Clear Recording on All Slides (this will delete narration and timings from all slides)
Save a recording:
Once you’re finished recording and ready to save and share your presentation, you can:
- Select File and navigate to either a. Save b. Export
You can share these files and your recording will play when the viewer opens the file.
Keynote
Recording presentation in Keynote is pretty straightforward. Either follow the steps below or check out the video tutorial!
To Record:
- Open your presentation, and click on the Inspector icon, then click Audio. Click the Record button.
- Next, click the File button, then click Record Slideshow. The recording will begin immediately.
- Click Play to navigate through your slides. You can narrate each slide, and use your mouse or trackpad to navigate between sleeds. You can also push the right arrow or left arrow cursor keys.
- When you are finished with the slideshow, push the Esc button on your keyboard.
- Click Play, then Play Slideshow to view your recorded slideshow.
- When you’re ready, click File > Export to export your slideshow as a video to share.
Tutorial: https://www.youtube.com/watch?v=fe280TjbAXw
Zoom
Zoom can be a useful tool for capturing interview footage to augment your presentation.
Setting up your Zoom to record at the highest quality
There are loads of settings under the hood on how to optimize your Zoom session recordings. This section will guide you through how to turn them on.
For meetings recording locally
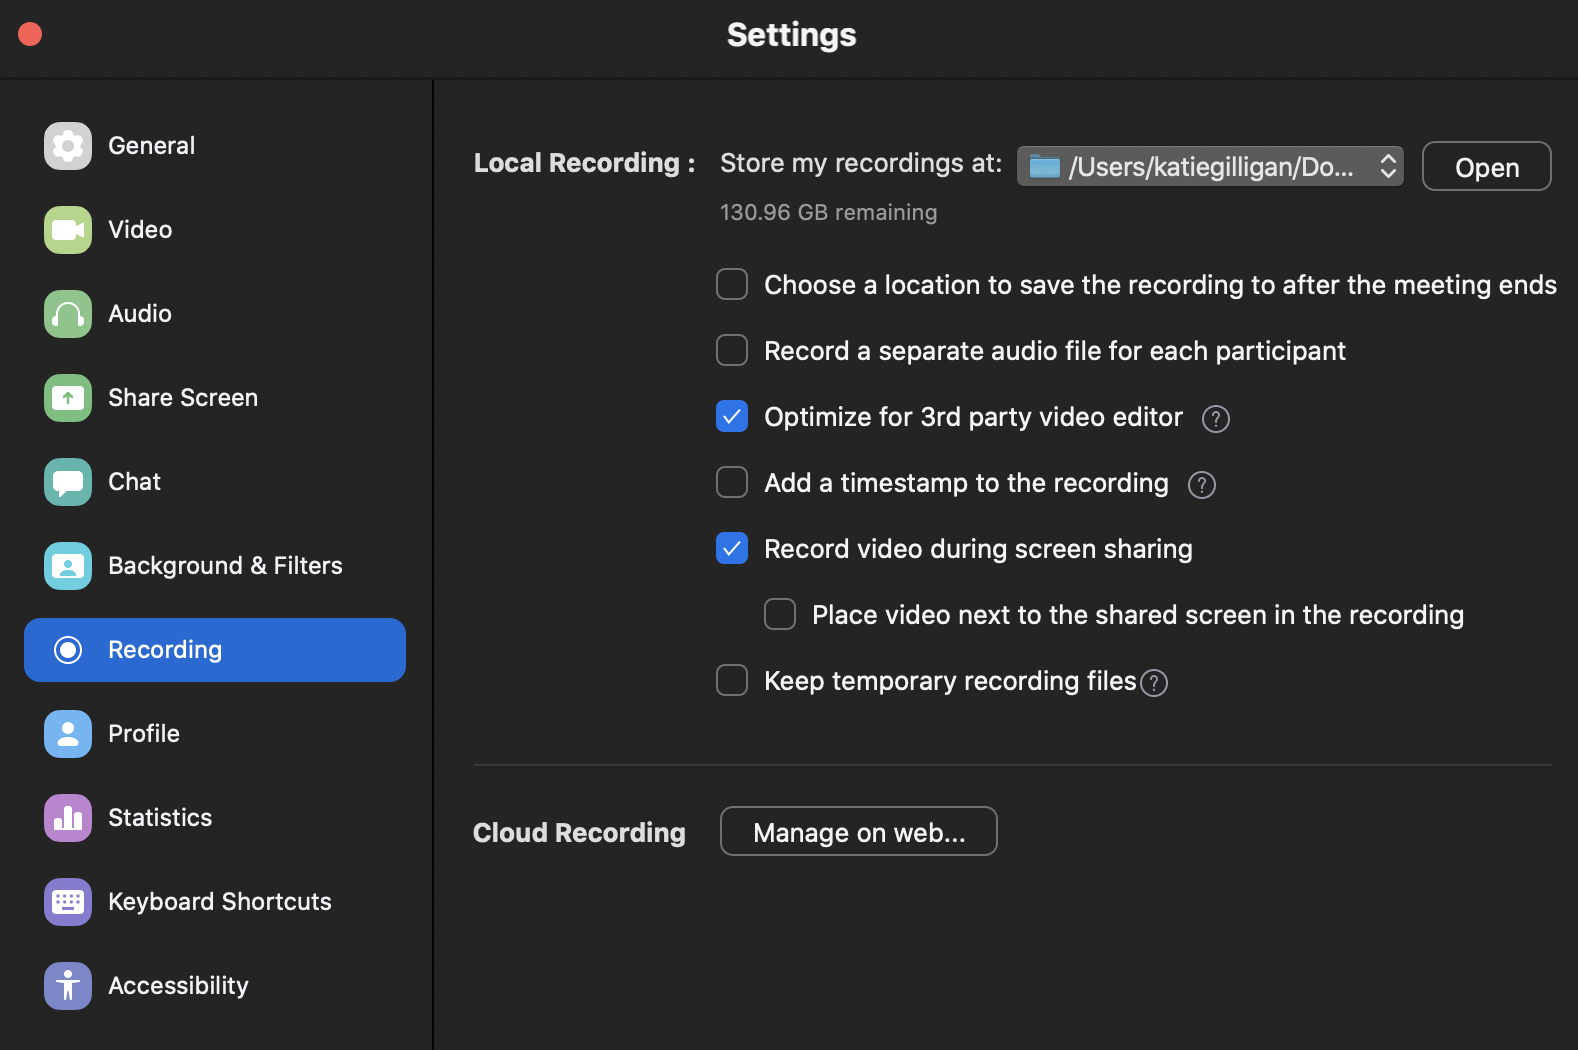
If you are planning to record by hitting the Record button in Zoom, there are some settings to optimize before you begin.
- Click the arrow next to
Start/Stop Videoand clickVideo Settings. - Open the
Recordingtab on the left. - Make sure that the following options are selected:
- Optimize for 3rd party video editor
- Record video during screen sharing
- If audio is important, consider selecting "Record a separate audio file for each participant
- Also take the time to select a folder to store your recording in.

Once the meeting ends, a box will pop up letting you know that your recording is saving.
For meetings set to Automatically record
Alternatively, here is a short video walkthrough as well.
Note: You'll have to be the meeting creator in order for this to work!
- Start by going to harvard.zoom.us.
- Click Settings in the panel on the left, then click Recording.
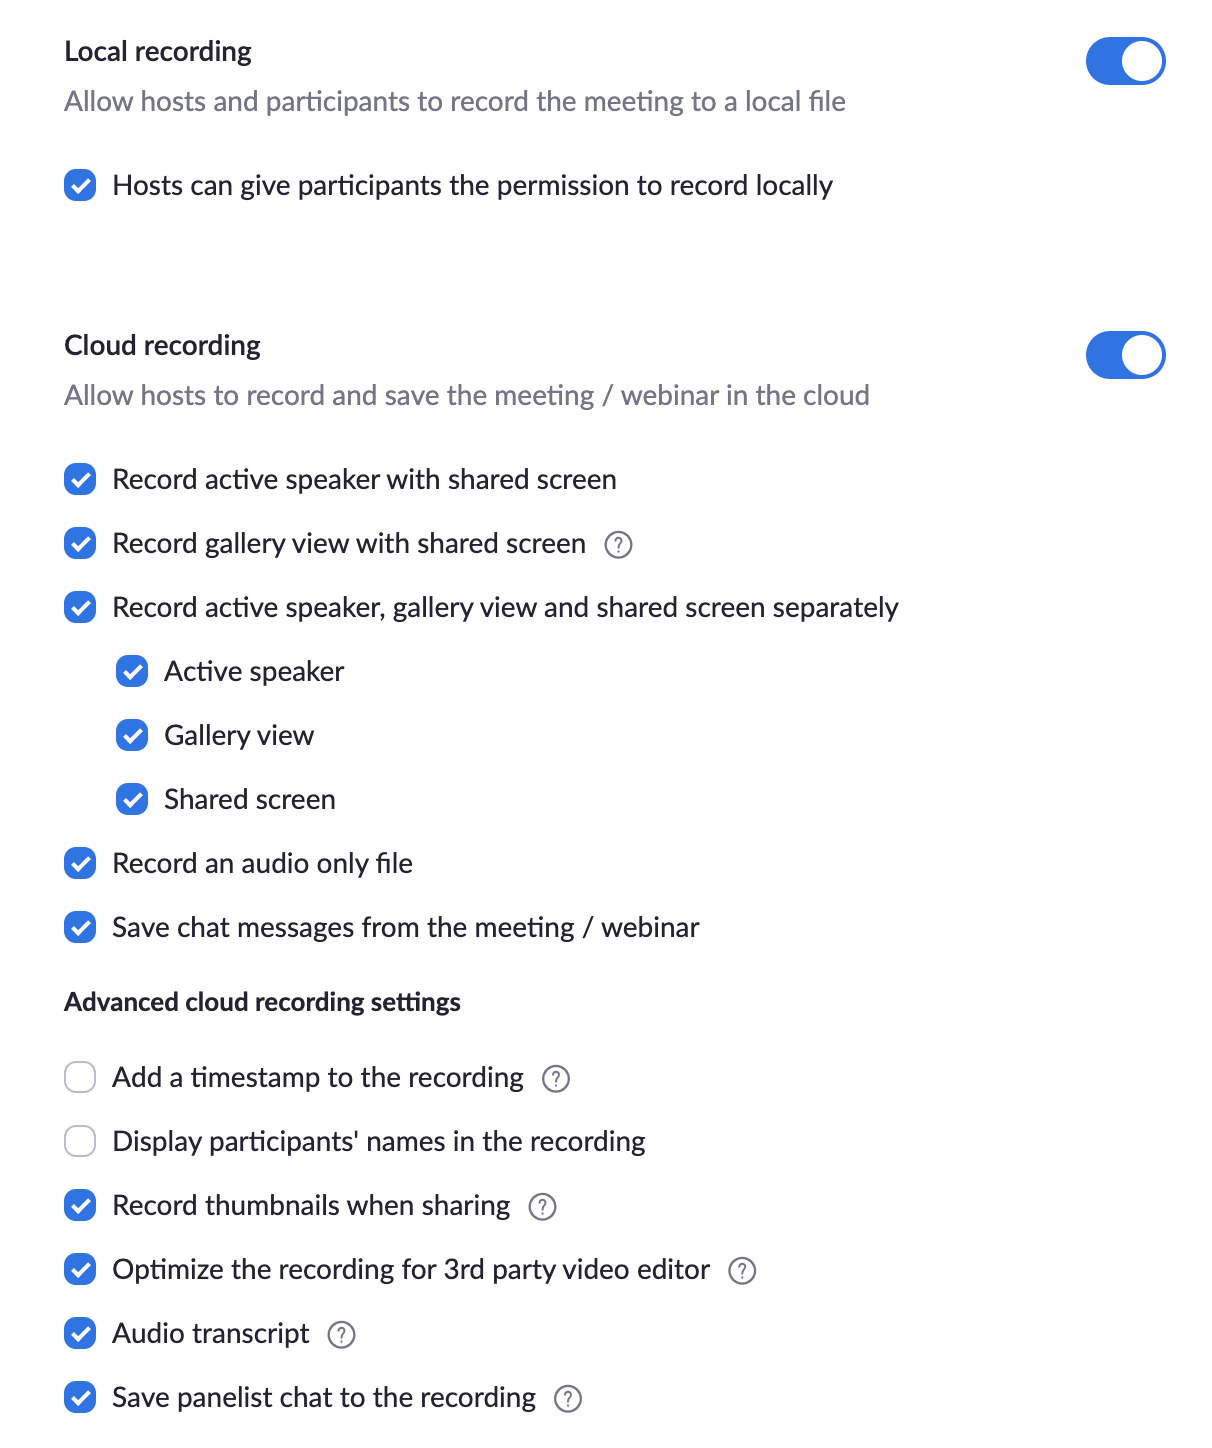
That will open a big panel that looks like this:

- You're going to want to go wild clicking all of these boxes except "Display participants' names in the recording" and "Add a timestamp to the recording". This will make sure you have all of the possible recordings for any meeting you are hosting.
For accessibility's sake, here's a typed list of all of the options you'll want to select:
Cloud recording
- Allow hosts to record and save the meeting / webinar in the cloud (yes)
- Record active speaker with shared screen (yes)
- Record gallery view with shared screen (yes)
- Record active speaker, gallery view and shared screen separately (yes)
- Active speaker (yes)
- Gallery view (yes)
- Shared screen (yes)
- Active speaker (yes)
- Record an audio only file (yes)
- Save chat messages from the meeting / webinar (yes)
Advanced cloud recording settings
- Add a timestamp to the recording (NO)
- Display participants' names in the recording (NO)
- Record thumbnails when sharing (yes)
- Optimize the recording for 3rd party video editor (yes)
- Audio transcript (yes)
- Save panelist chat to the recording (yes)