Final Cut Pro
The Entire LinkedIn Learning Course
YouTube Tutorials
The following is a beginner's tutorial for FCPX that discusses how to organize your files, loading clips onto the timeline, and how to begin editing photo, video, and music files:
Bringing Your Media Into the Timeline in Final Cut Pro X
There are a few different ways to get your media from your browser window into your timeline in Final Cut
- Select your clip and drag and drop it into the timeline
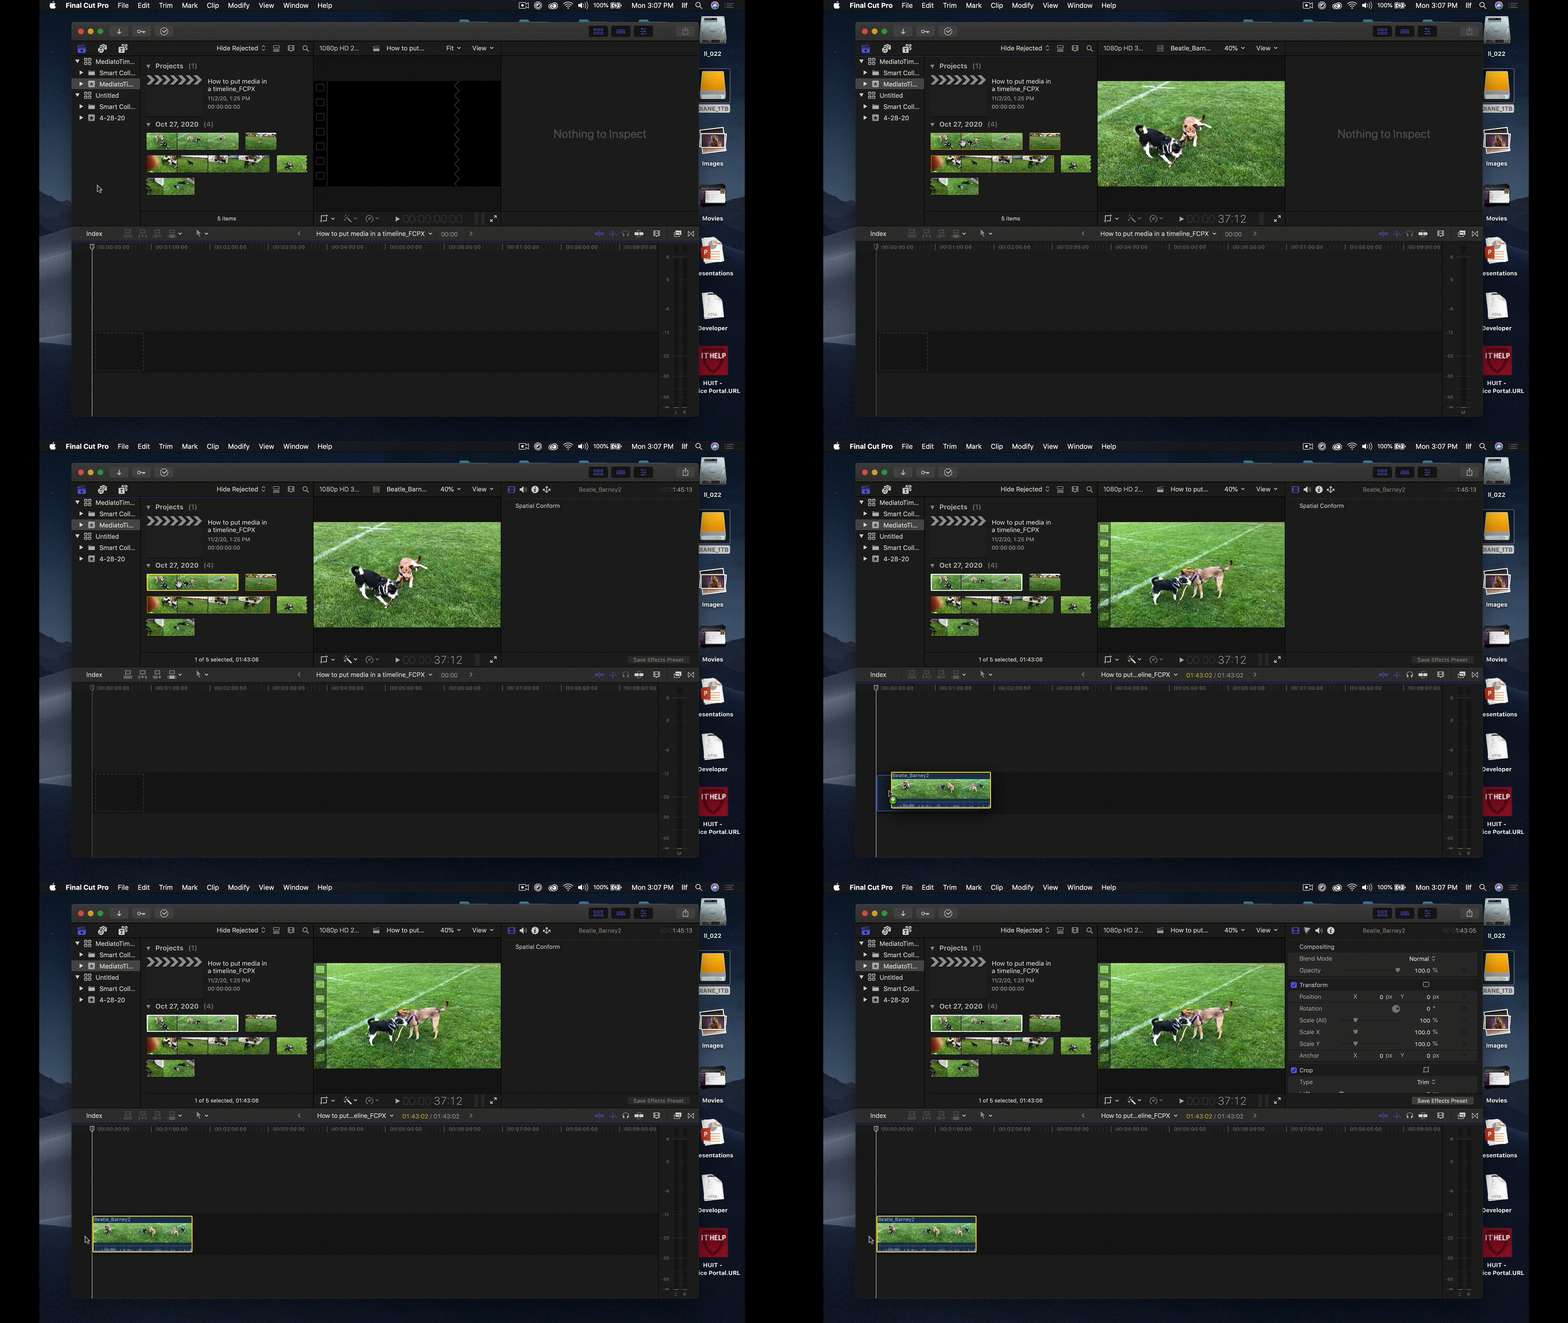
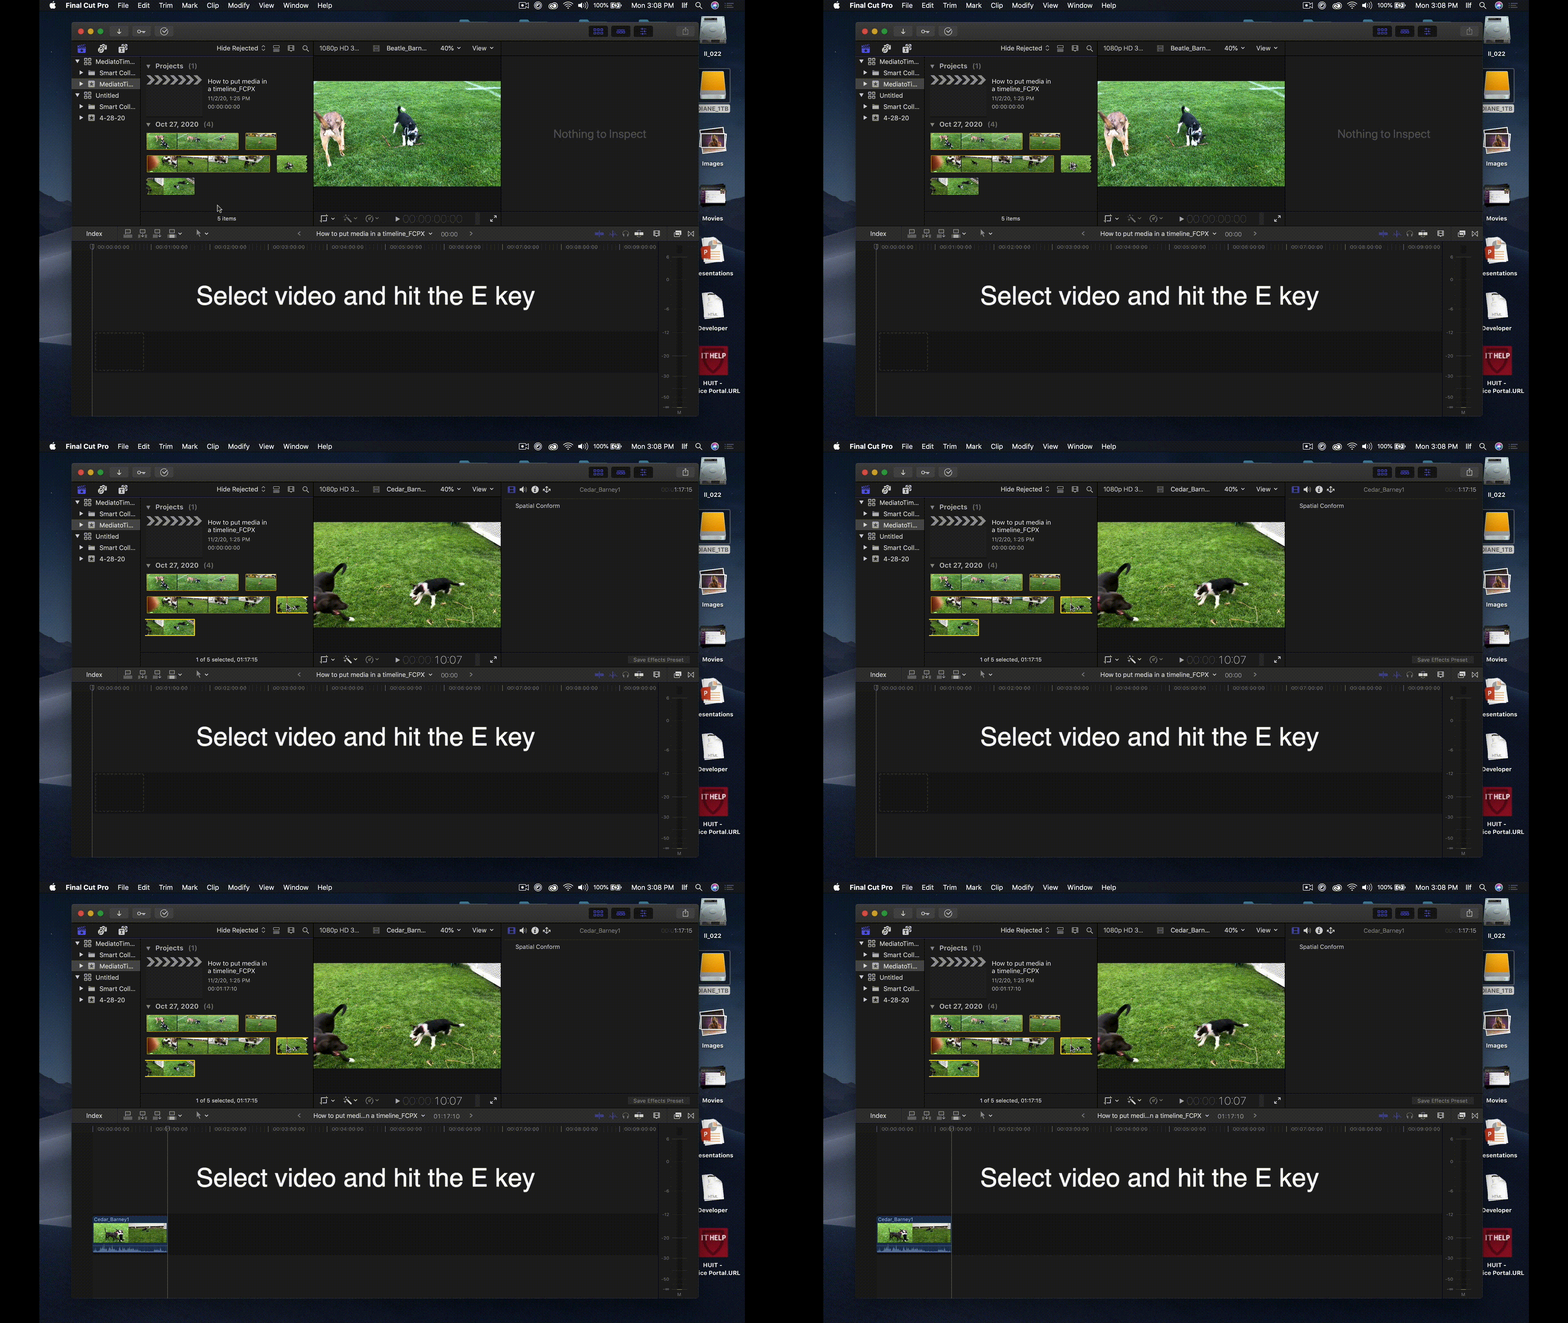
- Select your clip and hit the E key
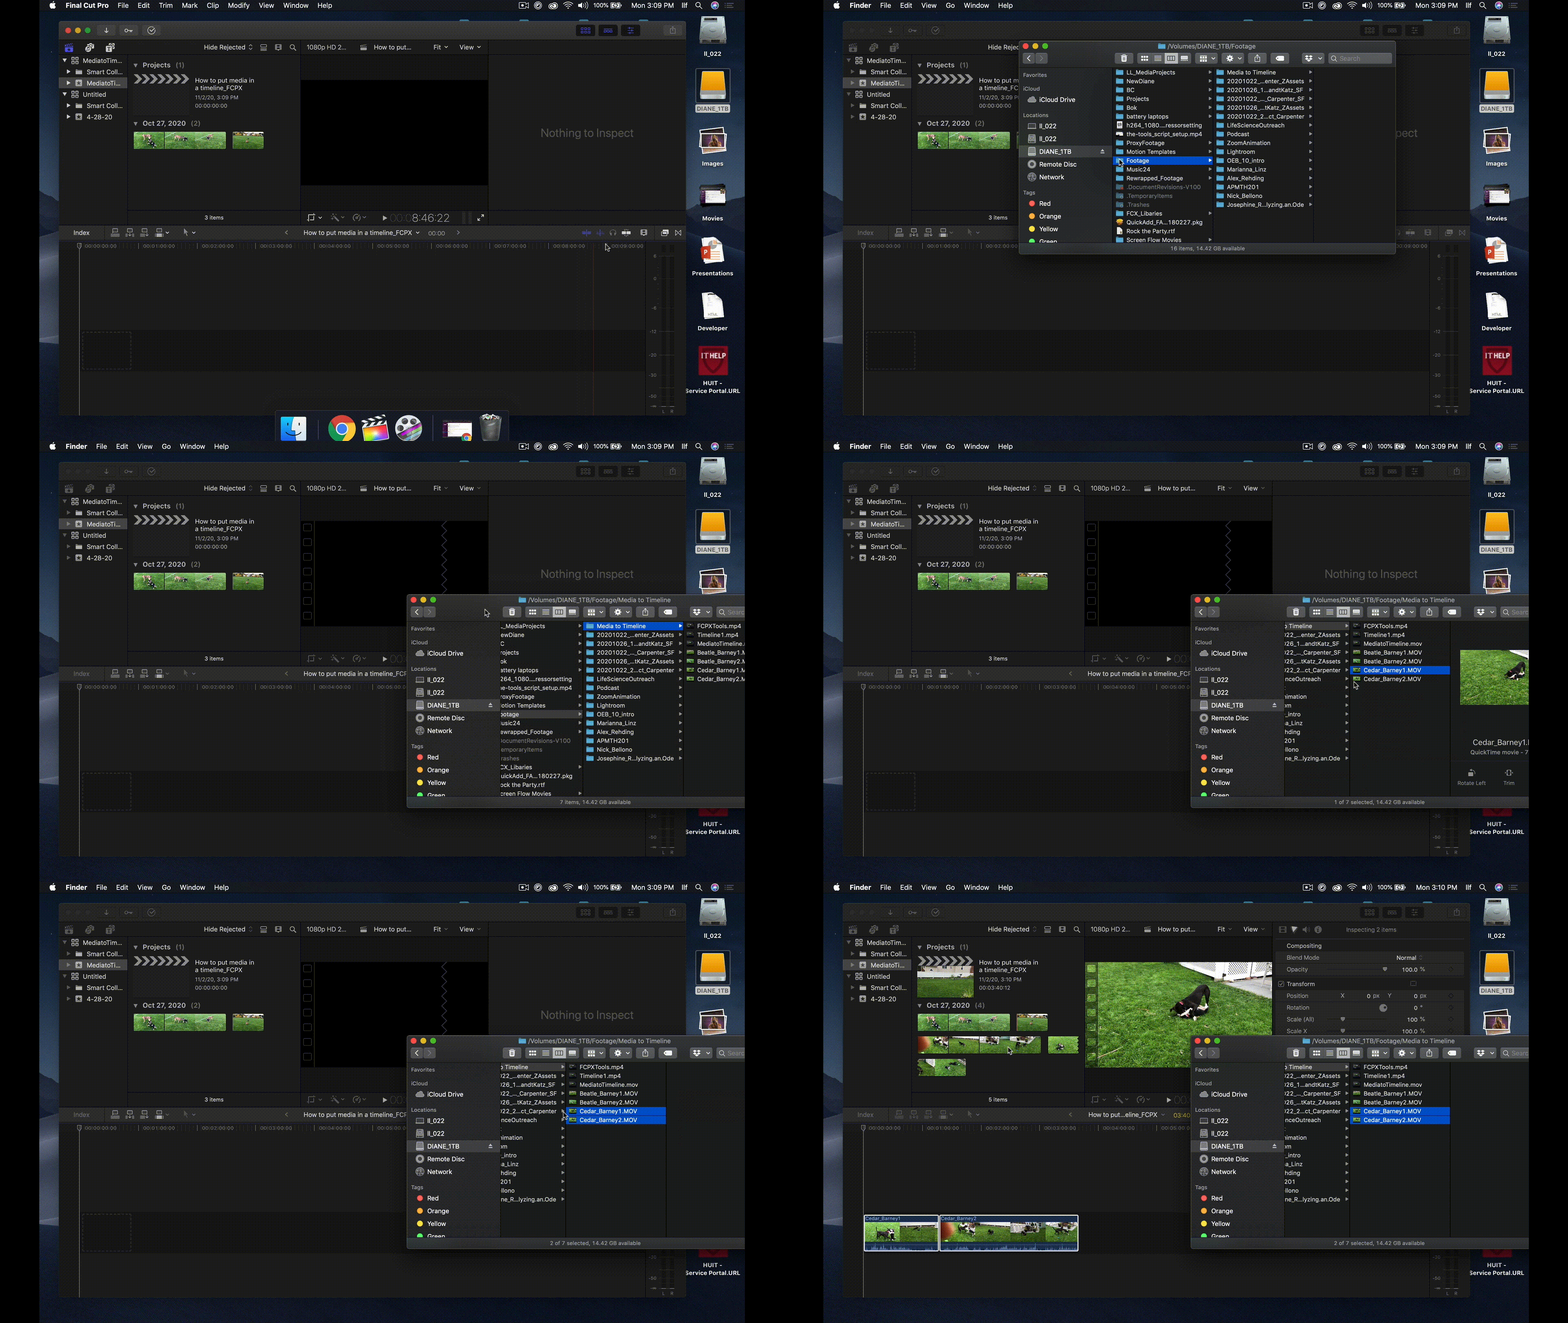
- Media can be dragged and dropped directly into the timeline This will also import them to your Event's browser window
- You can select in and out points on a clip by placing the playhead at your selected locations and hitting the I (inpoint) and O (outpoint) keys
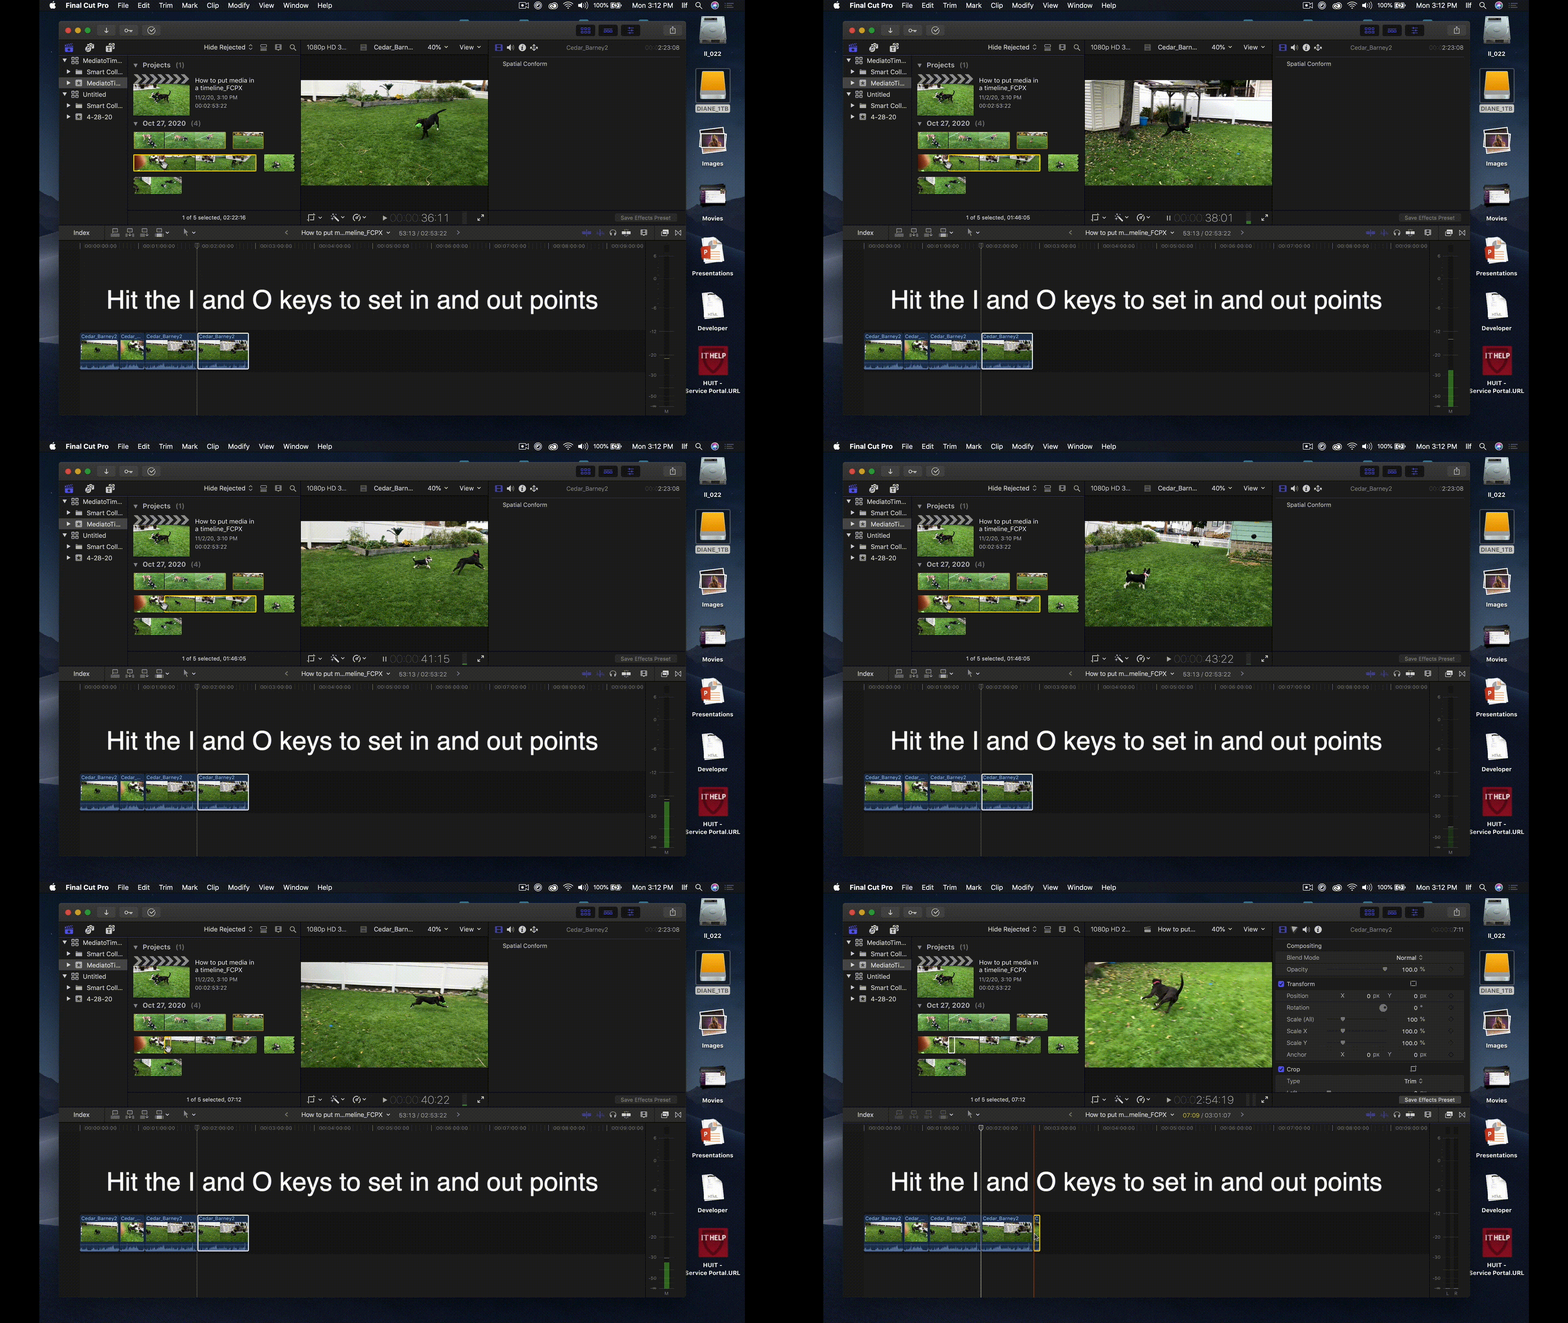
- You can click and drag along a clip to select a range inside it, then either hit the E key or drag and drop into the timeline

- While holding down the command key, you can select more than one clip at a time to drag into the timeline

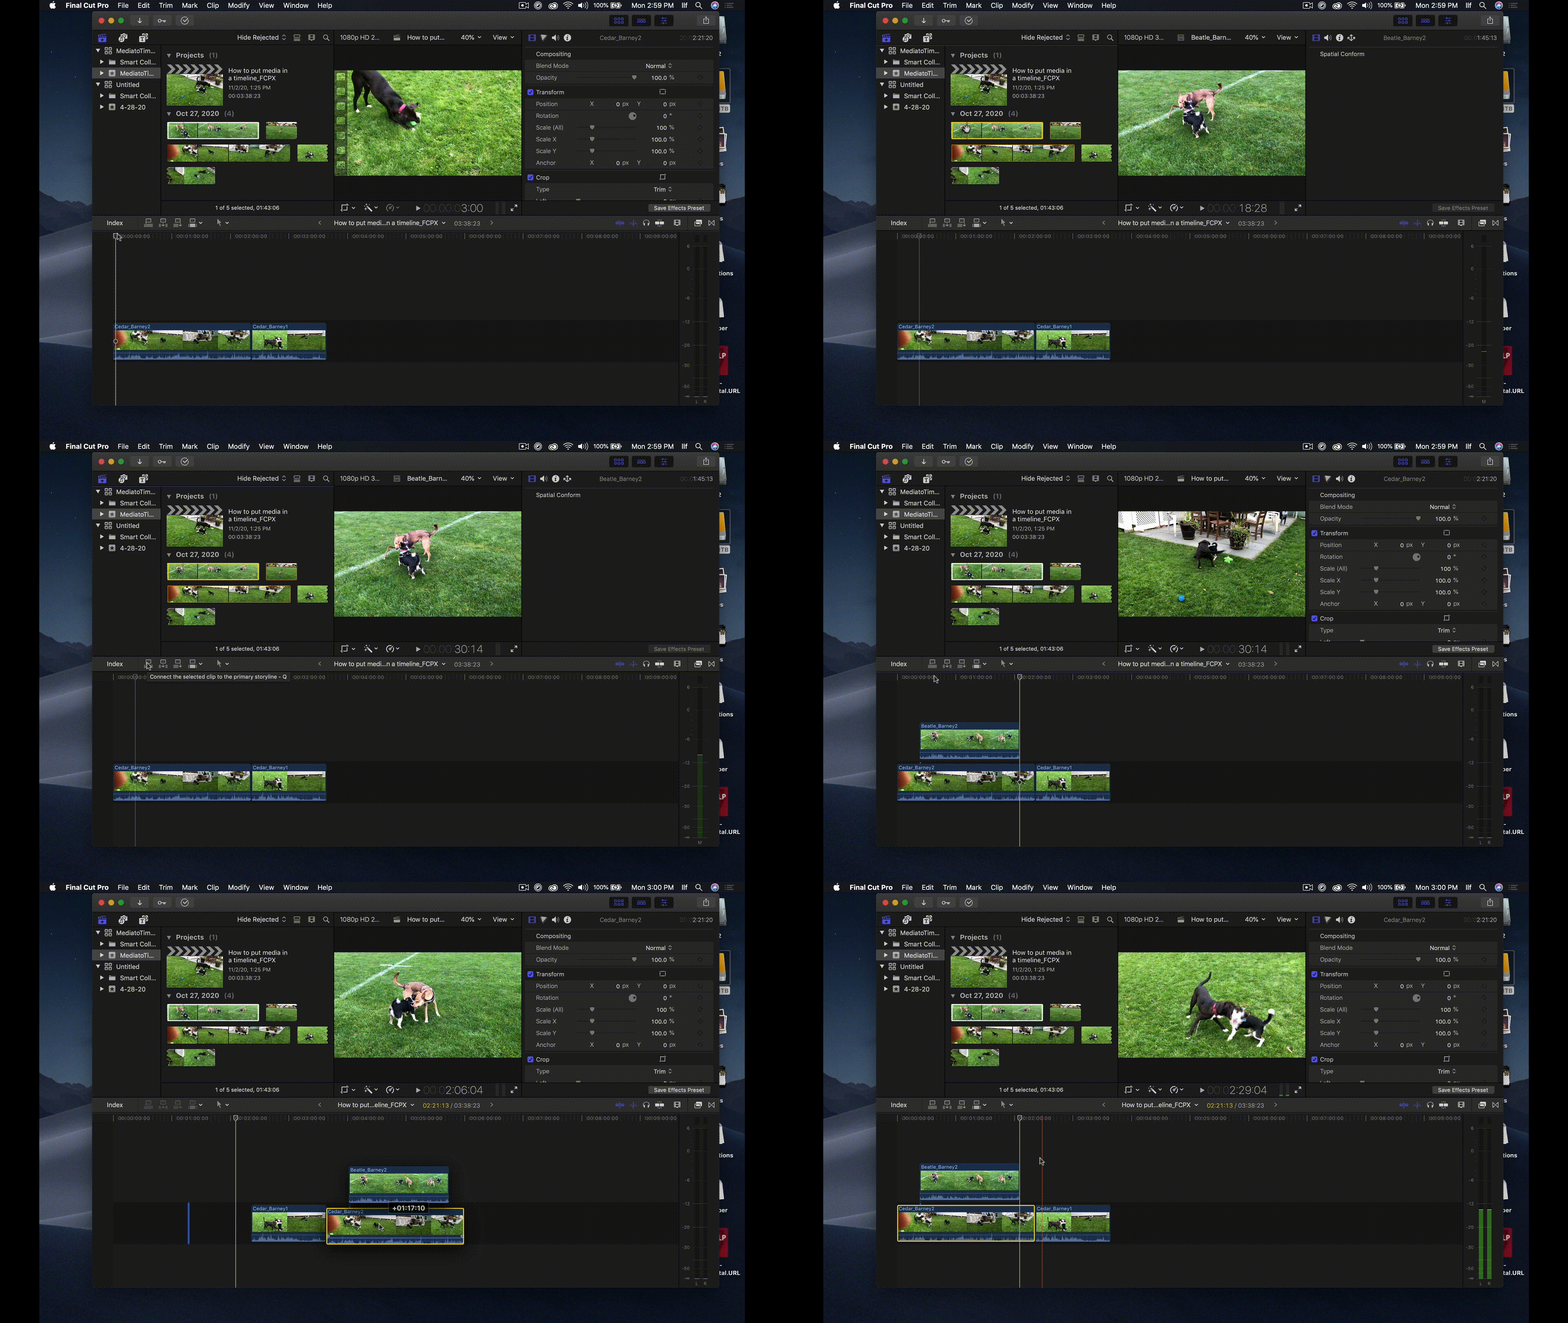
- You can attach media to other clips in the timeline Choose a location on the timeline and hit the Connect button, choose Connect to Primary Storyline under the Edit Menu or press the Q key If you move the primary storyline clip the connected clip will move with it
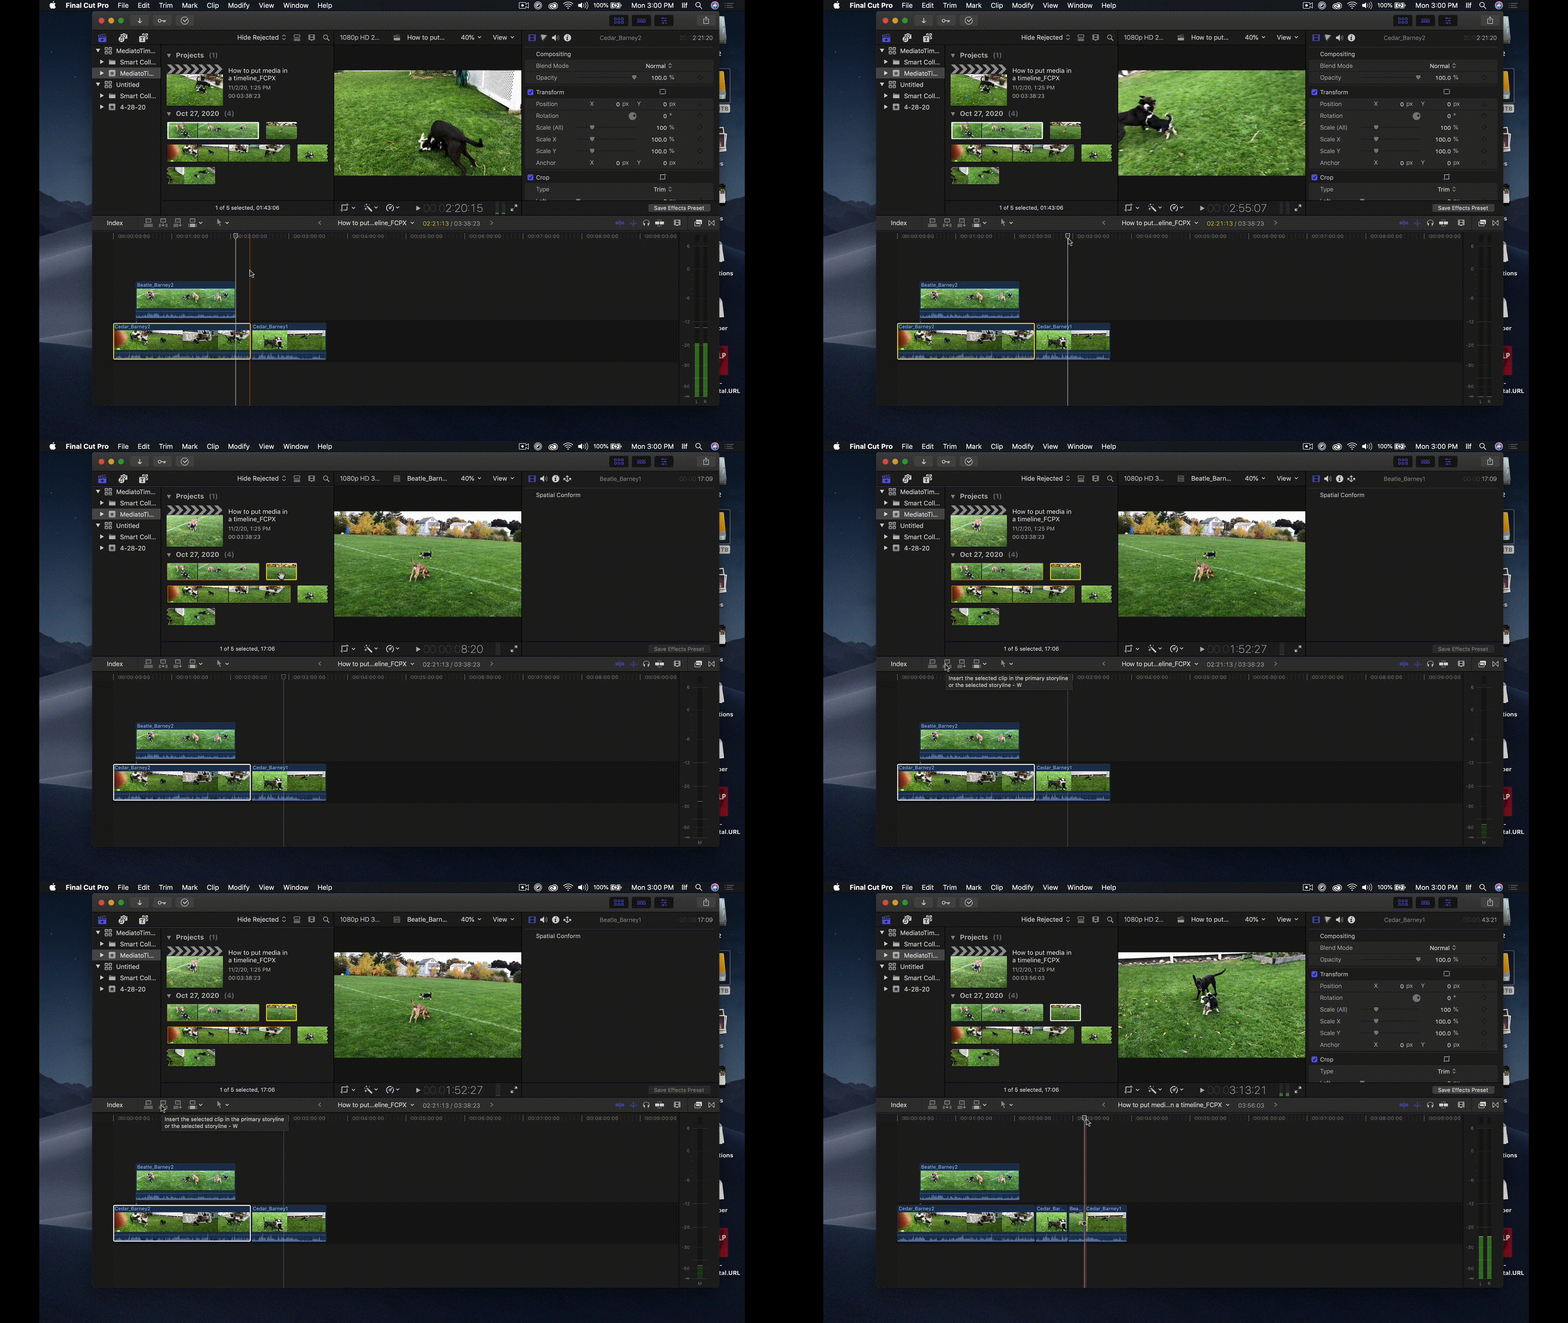
- You can insert a clip anywhere on the timeline by choosing a location with the playhead, selecting a clip in your Browser Window and hitting the Insert button, choosing Insert from the Edit Menu or hitting the W key
- You can overwrite a section of a clip with the Overwrite button. Use this button when you want to replace media for a specific span of time, rather than replacing the entire clip. Choose the location on the timeline where you want the video to be overwritten, hit the Overwrite button, choose Overwrite from the Edit menu or hit the D key. You can also choose to overwrite just the video, just the audio or both.

- You can also use the Append button, choose Append to Storyline from the Edit Menu, or hit the E key to add media to the end of the timeline

Exporting Video from Final Cut Pro X
There are a number of different ways to export your finished movie.
For uploading to Youtube, Vimeo, Canvas, sharing with classmates, etc the best destination to use is Apple Devices 1080p.
- Go to File> Share> Apple Devices 1080p or select the Share Icon in the upper right-hand corner of the window
The codec we recommend is H.264. It is very efficient and provides high-quality images and uses a lower bit rate resulting in a smaller file size that is much easier to be managed by streaming services who compress your file further.
If you export using ProRes settings, you can see how much bigger the file size becomes.
If your final product is a DVD, Thesis submission or perhaps an entry to a short film contest, you might want your share destination to be Master File instead of Apple Devices 1080p because that setting produces a type of Apple-specific .m4v extension which is optimized for playback within the Apple ecosystem – not necessarily outside it.
You can also share only a part of your video by using the range selector.
A walkthrough of L & J Cuts
