Capture Tips and Protocols
If you are going to get the participants in your media project to capture themselves, you'll need to provide them with some guidance on how they should be capturing themselves. It's hard enough producing stylistic continuity when you are capturing all the footage yourself, let alone when you are distributing the task to participants with varying levels of experience. So below you will find some ideas on
- how you can "level up" your participants' video and audio acquisition skills and
- how you might develop a "capture protocol" or "shot list" that helps multiple participants produce stylistically similar results.
You have to be realistic about the amount of information your participants are going to be able to take in, so, in general, a short series of tips or requirements makes more sense than a ten-page manual.
Option 1: Playful GIF examples
In this series of gifs, Learning Lab Undergraduate Fellow, Sophie Bauder illustrates to top 3 things she wants her participants to think about:
A. Frame yourself with the right amount of headroom, not too far away and not too close, and look straight into the camera

B. Find a quiet place and stay close to the phone so that we can hear you

C. Make sure you are facing your light source (i.e. that you aren't backlit)

Option 2: The Template Shot
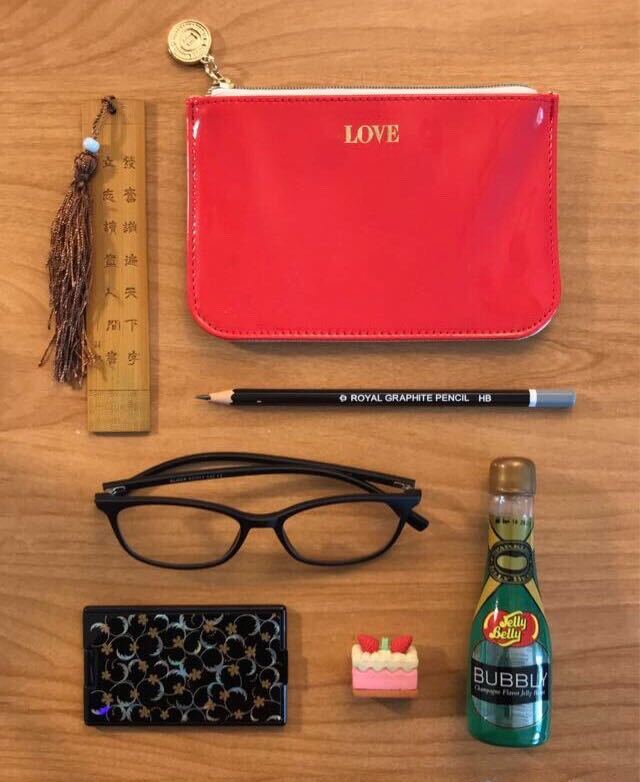
Another option is to offer participants a template shot you'd like them to reproduce. In this project, Learning Lab Fellow Jordan Koffman asked her participants to produce a "self-portrait in objects," and offered the following shot as her example.

And her participants sent back the following:


Option 3: The Shot List
For participants who have never edited a film (probably most of them!) it may not be entirely obvious that you need a wide array of shots to tell a visual story (i.e. you probably don't want just ONE shot of them talking to the camera; you'll also need some shots that help explain who they are, where they are, and what they're doing). Here is an example of a shotlist you might provide participants in a documentary about remote learning.
- shoot your interview in selfie-mode so you can see how you are framed, but shoot in "landscape" (horizontal) rather than "portrait" (vertical) orientation. Set the phone down in a stable position at roughly eye level, and frame the shot so that your eyes are roughly one-third of the way from the top of the frame.
- capture one shot that slowly pans across the room that you are sitting in
- capture one shot of the desk or other space you are sitting at as you participate in remote learning
- capture three shots of your computer or other device that you use to connect to the remote classroom
- capture five closeups of objects that say something about your experience as a student in the remote classroom
- capture three extreme closeups of your screen (they can even be so close that they get a little distorted--these shots will be for artsy transitions between segments!)
Option 4: The Tutorial
Sometimes it may be easiest to just film yourself walking through what you want your subjects to do. In this video, Bok Learning Lab Studio Coordinator Casey Cann explains how to record high quality audio using the iPhone's Voice memo app:
Podcasting using the Voice memo app