EDITING PHOTOS IN LIGHTROOM
Key Adjustments to Know
Lightroom (Lr) is a powerful photo editor that tends to get overshadowed by its brother, Photoshop. Unlike Photoshop, Lightroom is a non-destructive photo editor, which means that you can always access the original photograph. Lightroom is also a photo library, allowing you to sort your work by collections and keywords. Ahead, we will discuss several adjustments you can make to your photos using the tool.
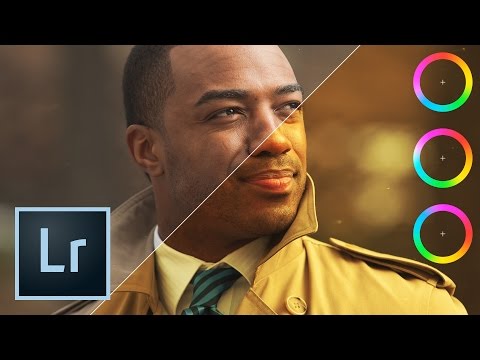
White Balance (WB)
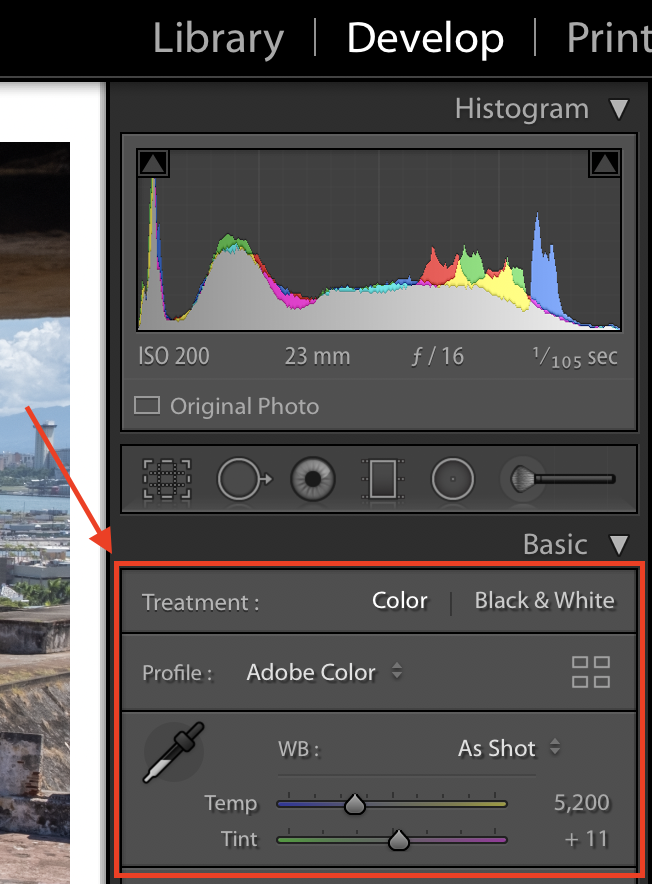
The first adjustment I make to my photos is a White Balance adjustment. This is the process of removing unrealistic color casts, so that objects that appear white in "real life" are white in the photograph (For more information, read here). Below you will find an example of both incorrect and correct WB:
 The image on the left/top looks very warm (i.e. "yellow"), whereas the image on the right/bottom looks more natural, with the correct color tones.
In Lr, you will find your editing tools on the righthand side. As seen below, the WB section is below the Histogram. You can either manually move the sliders to make your image warmers or cooler, or you select "As Shot" and a pop-up appears with preselected WB adjustments.
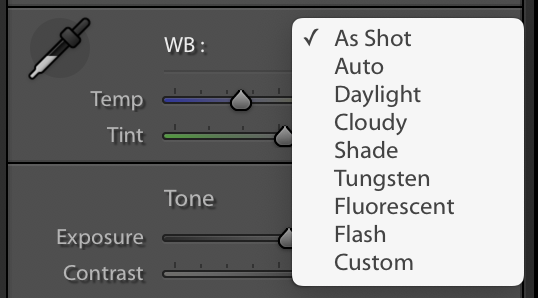
Left/Top: Where to locate the WB sliders in Lr // Right/Bottom: WB presets that you can use as a starting point.
Exposure
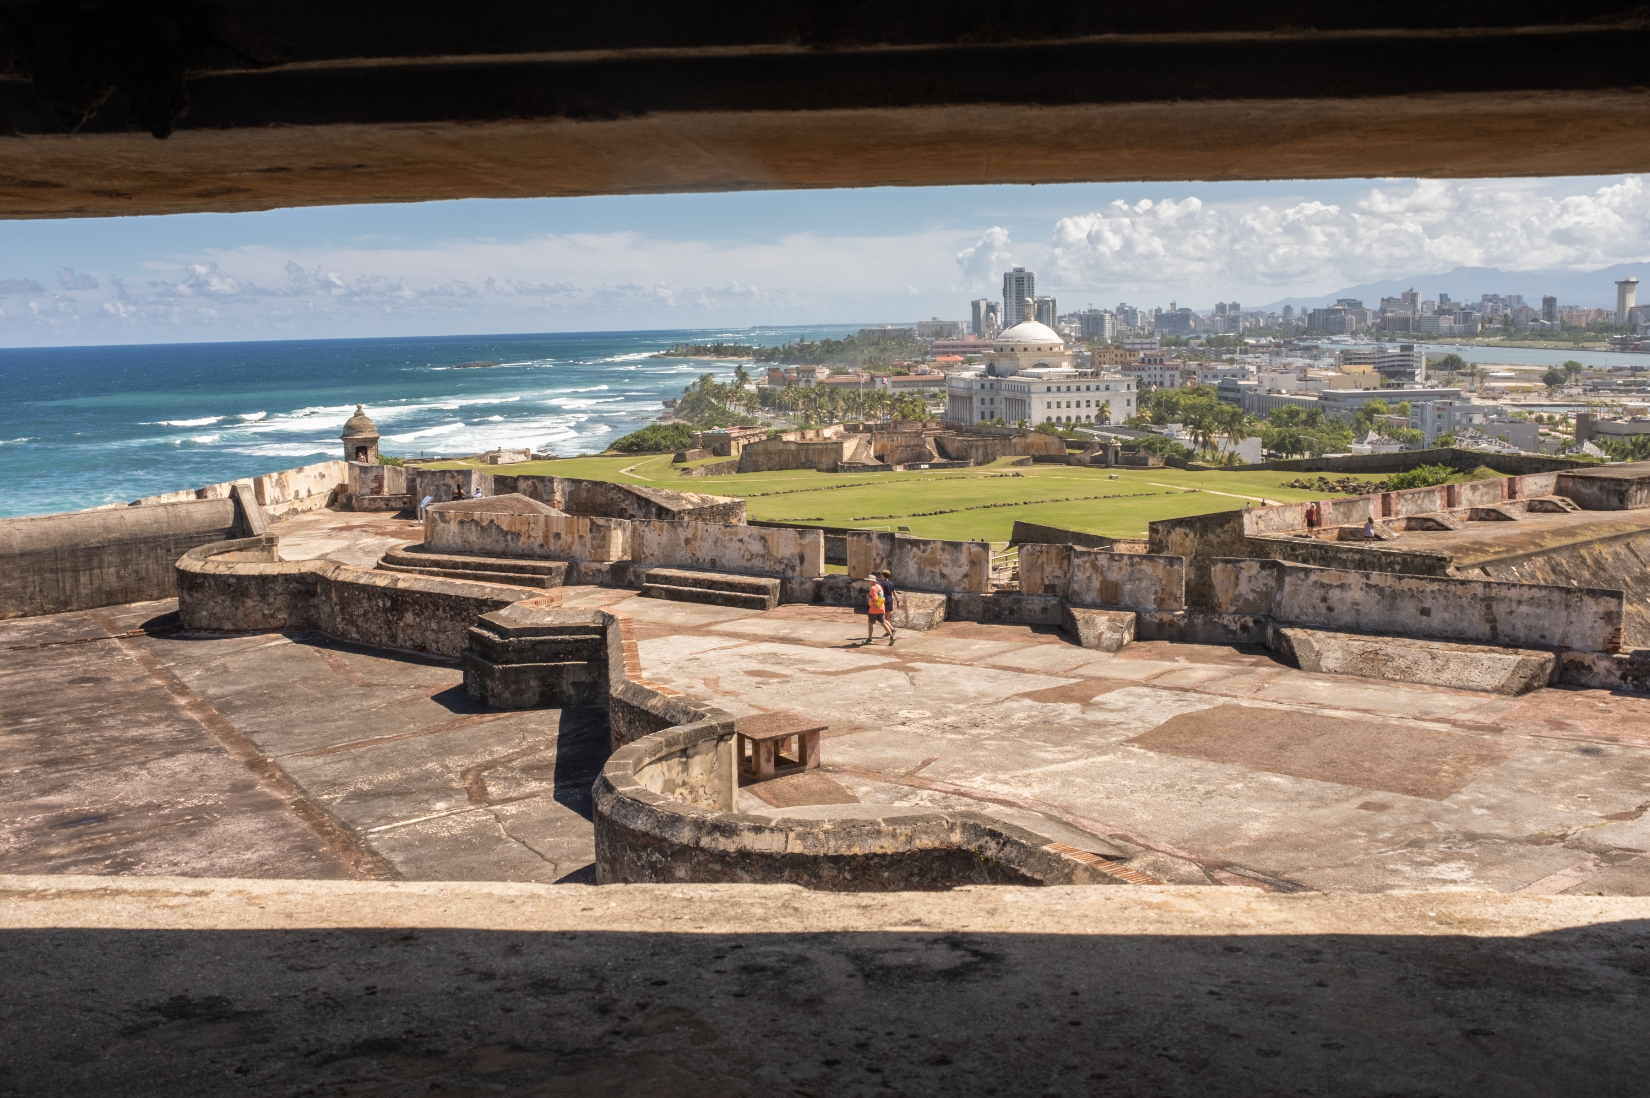
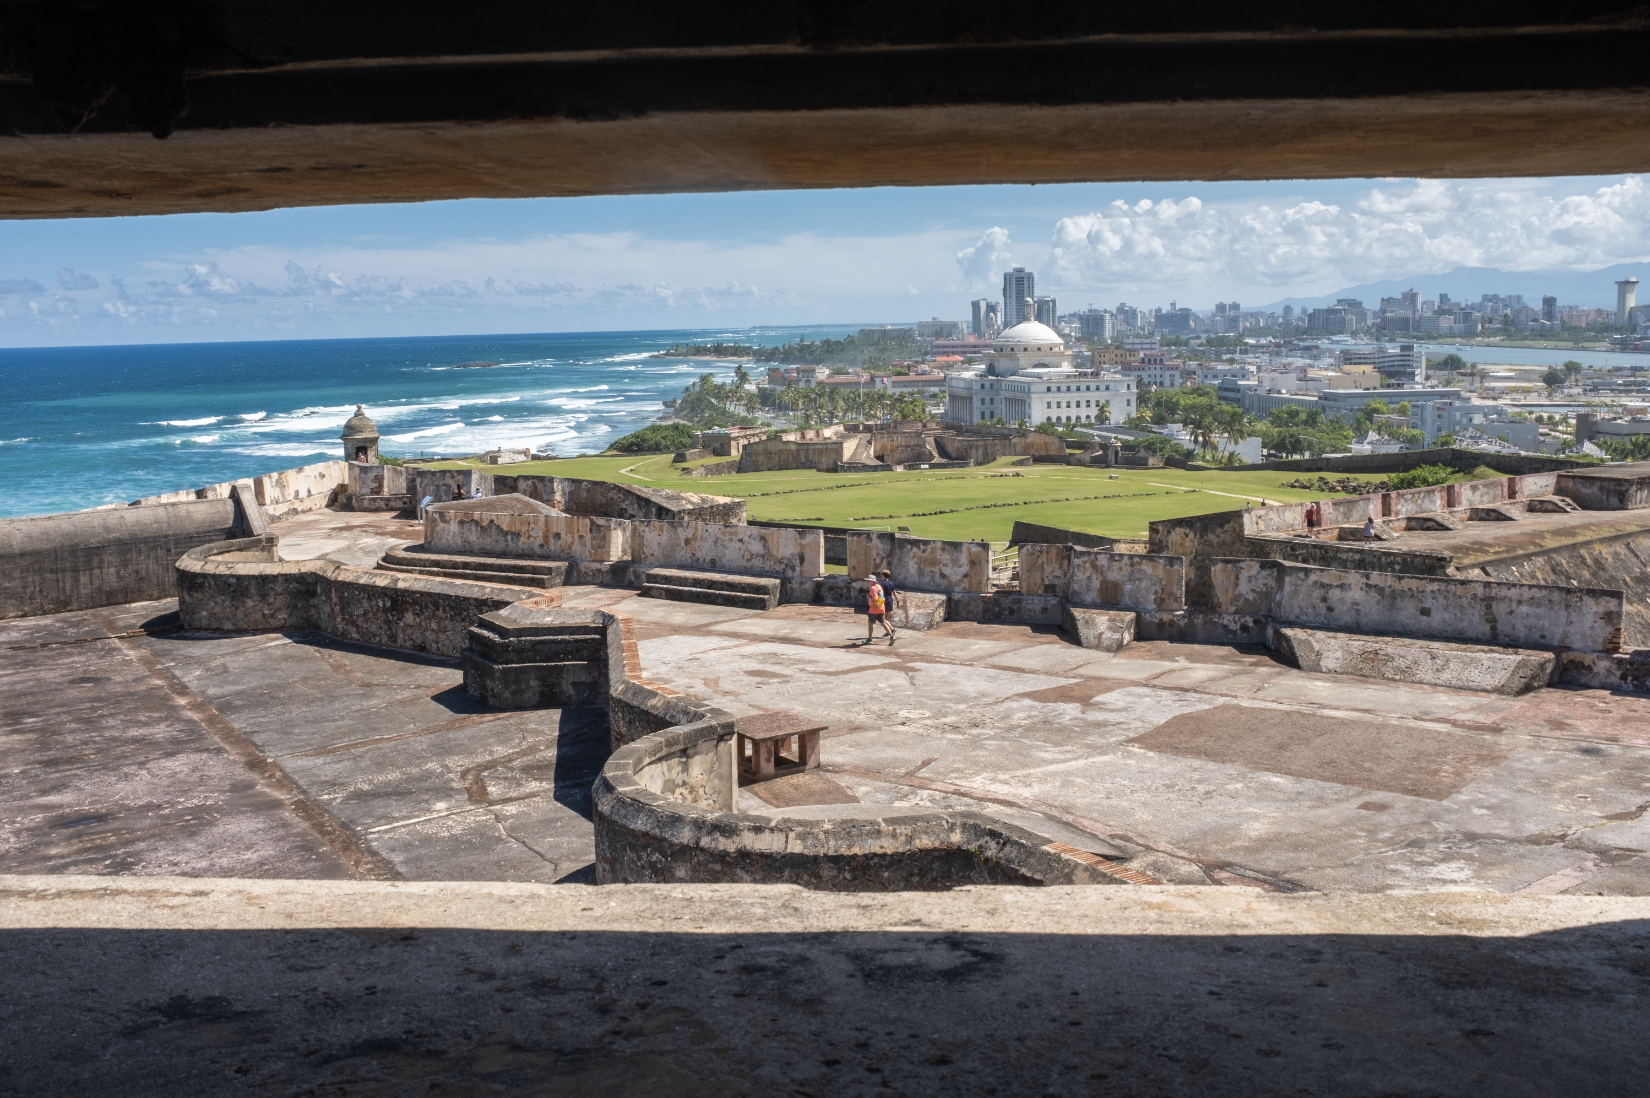
The next adjustment you can make to your photograph is Exposure, which determines how much light there is overall. Below you will find an example of an image that is underexposed, correctly exposed, and overexposed.

 Left/Top to Right/Bottom: Underexposed, Exposed Correctly, Overexposed.
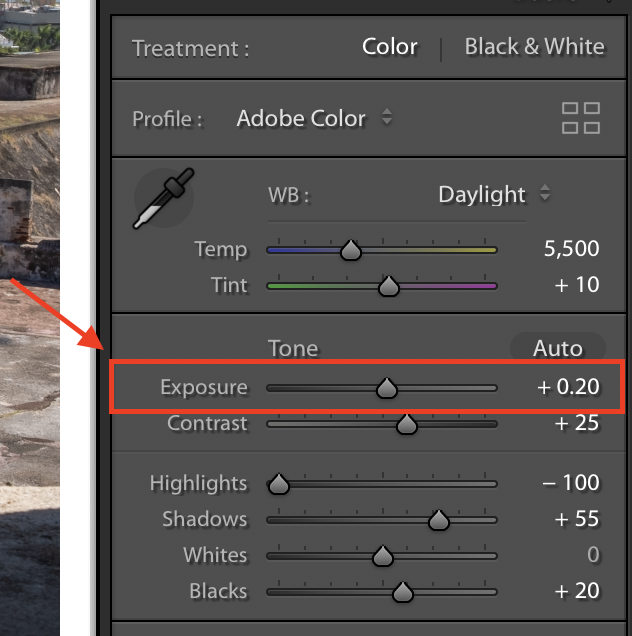 Where to locate the Exposure slider in Lr.
Highlights and Shadows
Once your overall image has the appropriate exposure, you may still find that some areas are still too bright or too dark. If this is the case, you can use the Highlights and Shadows sliders to make adjustments.
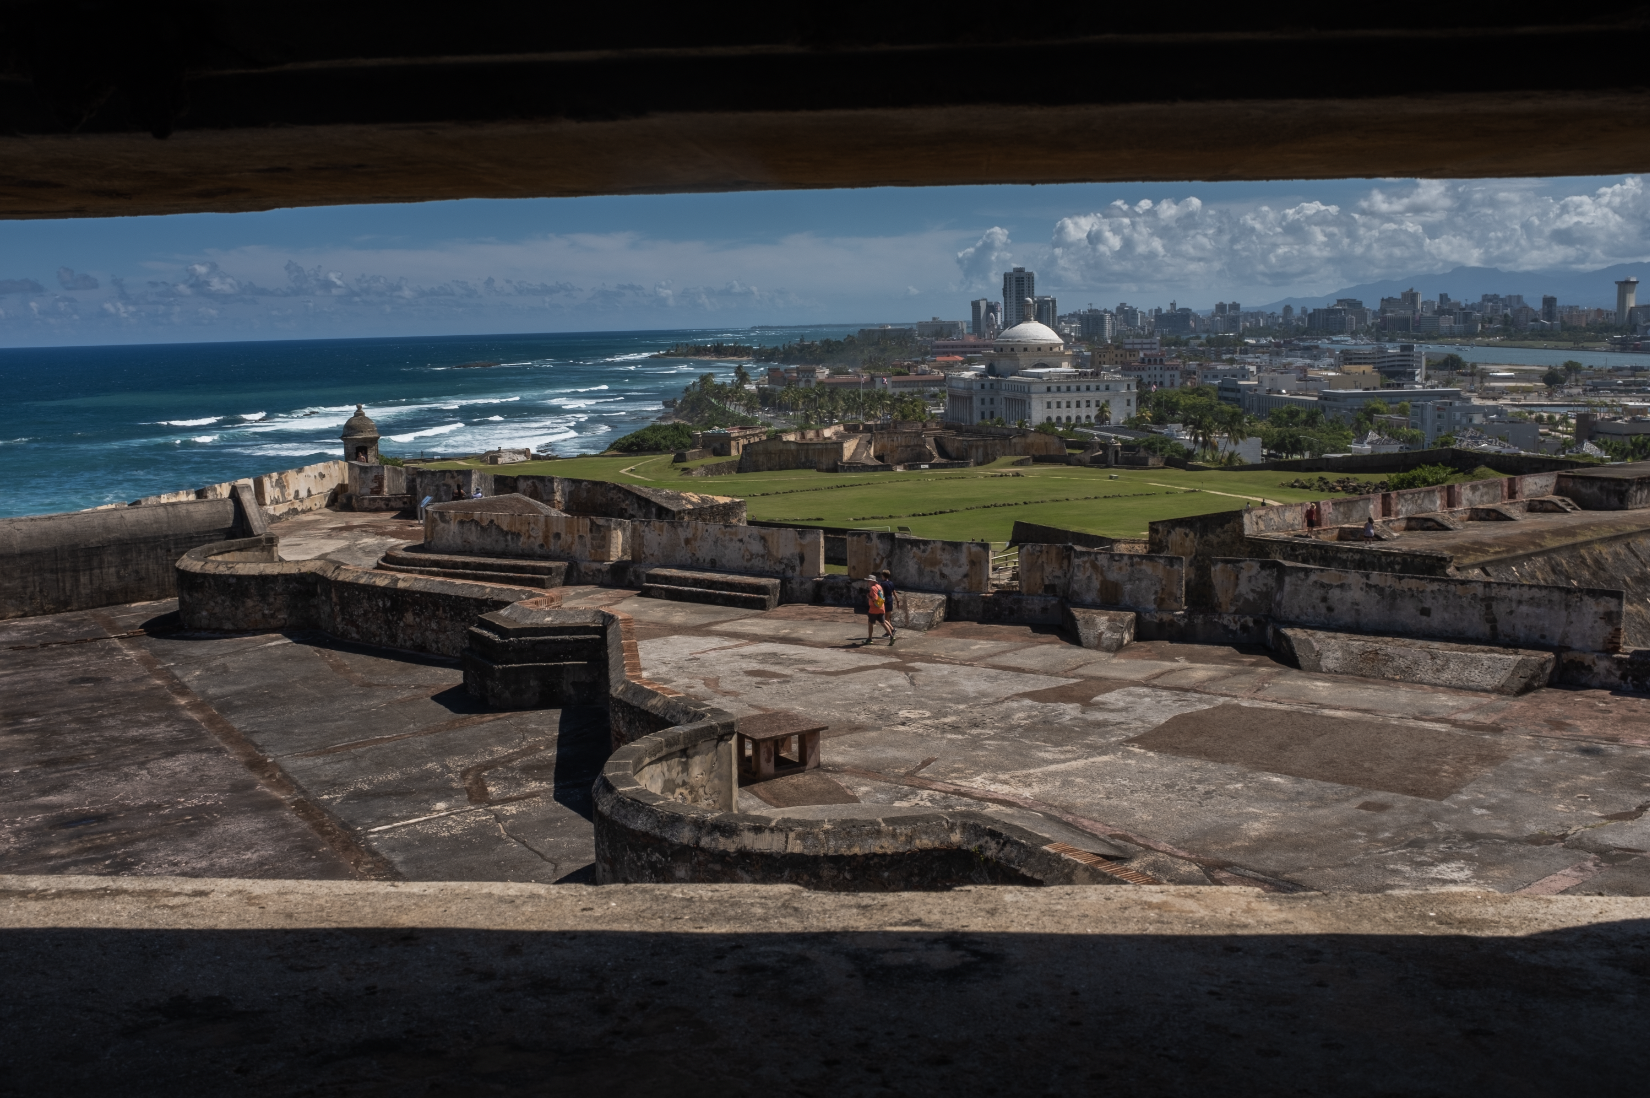
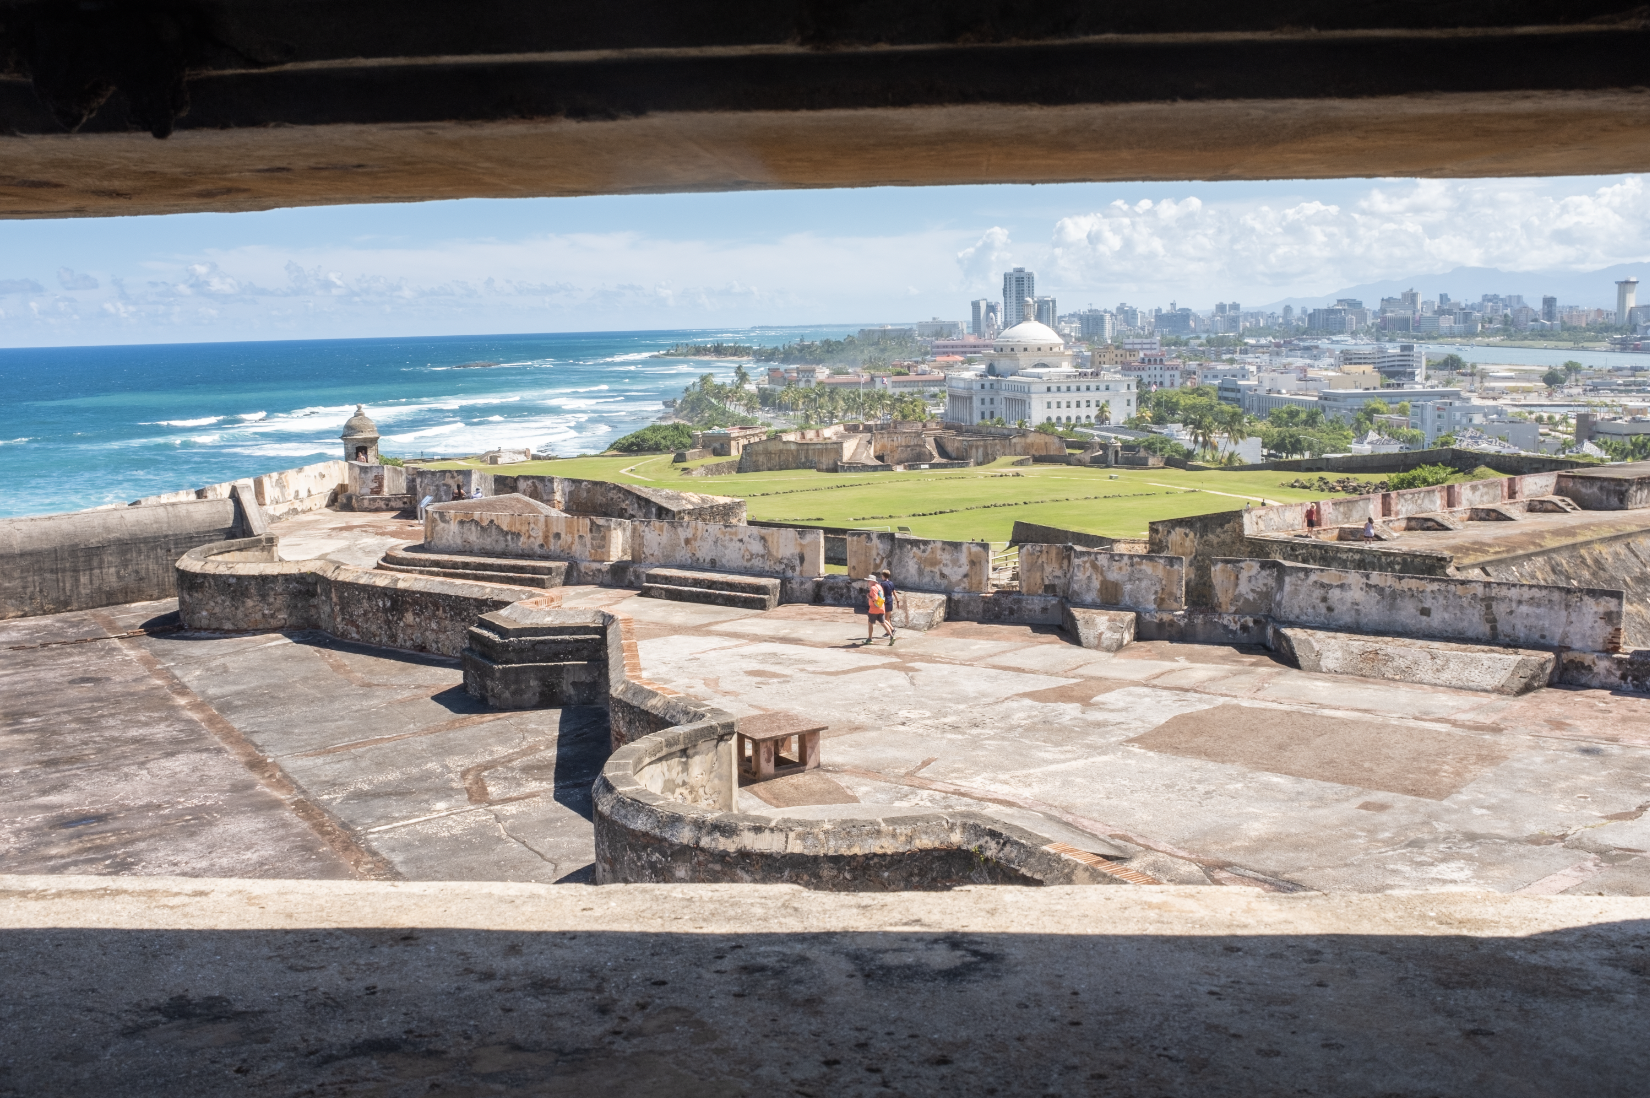
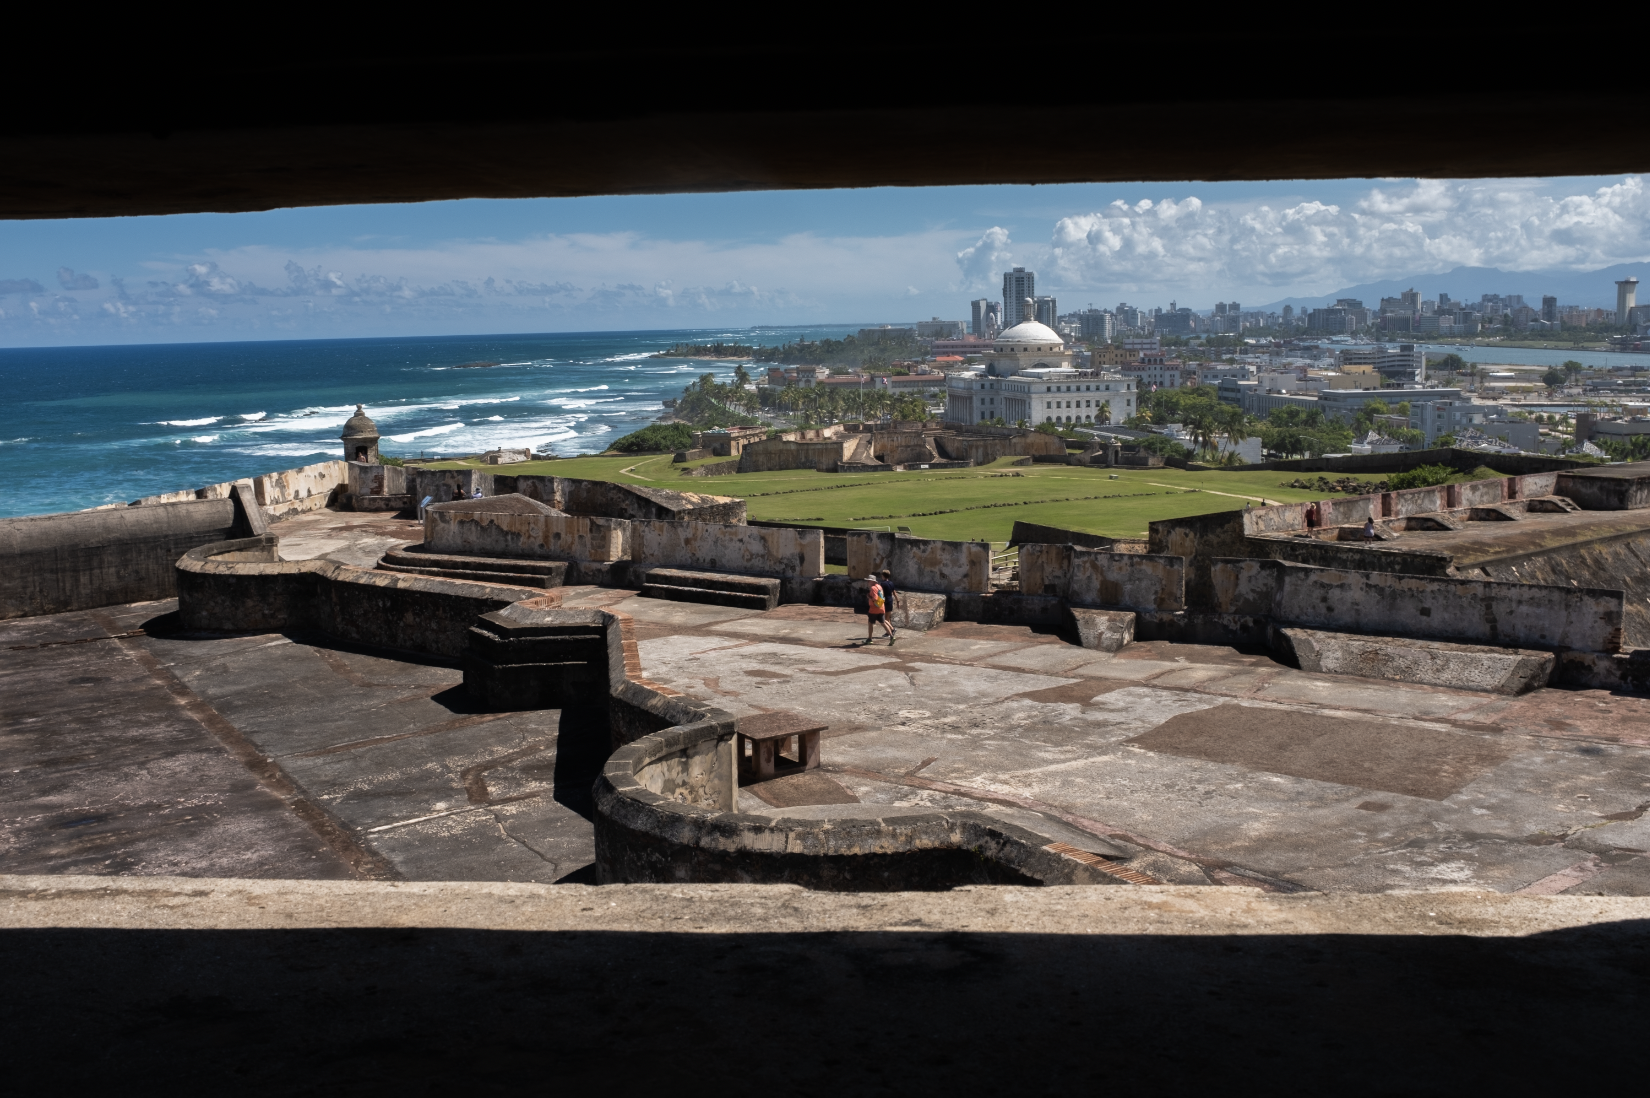
Adjusting the highlights allow you to recover the details in areas that are too bright. As seen in the left image below, the skyline and sky look very bright. After decreasing the highlights we are able to recover the buildings and the clouds, as well as bring in the details in other areas lit by the strong sunlight.
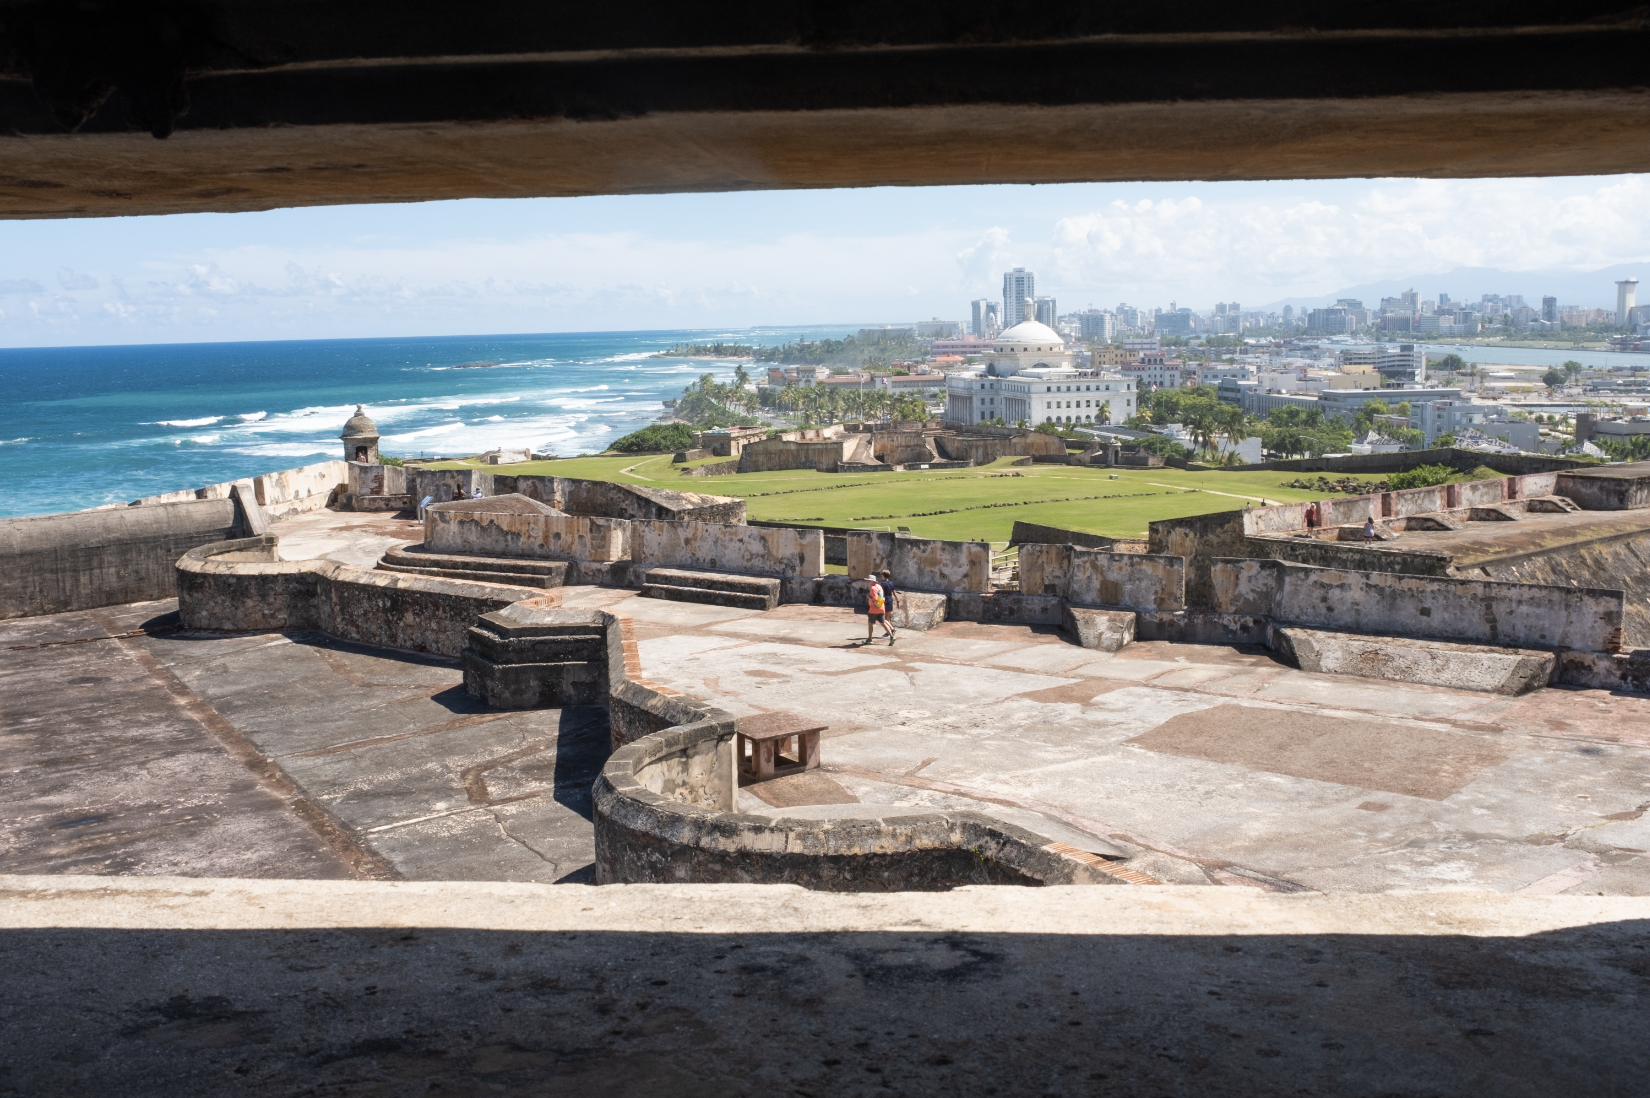
 Left/Top: Unedited Highlights (0) // Right/Bottom: Edited Highlights (-80)
On the other hand, by increasing the shadows allow you to recover the details in the areas that are too dark. Decreasing the shadows further "crushes" the dark areas by making them darker. Focusing on the foreground, you can see how when the shadows have been decreased (Left/Top), the dark areas become darker, but when you increased the shadows (Right/Bottom), the area has more light and can discern more rock details.

 Left/Top: Edited Shadows (-50) // Center/Middle: Unedited Shadows (0) // Right/Bottom: Edited Shadows (+50)
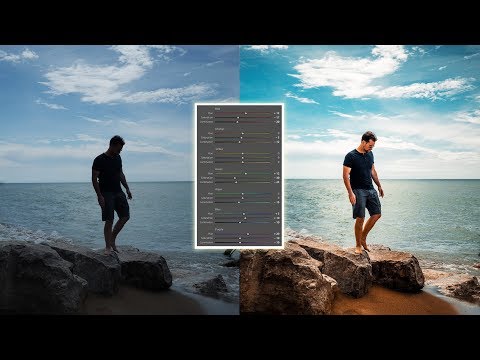
Vibrance and Saturation
Once you have edited the lighting to your desire, we can focus on the colors. Lr gives you the tools to edit individual colors, but first, we will discuss how to make more general global adjustments using the Vibrance and Saturation sliders.
In short, these two sliders allow you to edit how intense the colors are. By adjusting the saturation, you will be making a uniform intensity adjustment across all colors. On the other hand, adjusting the vibrance will apply intensity changes to the more muted colors and not as much to the already saturated ones.
First, we will take a look at what adjusting the saturation does to the image. As you can see on the right, when we increase the saturation, all the colors in the image "pop" more as they are more intense.
 Left/Top: Unedited Saturation (0) // Right/Bottom: Edited Saturation (+50)
Next, let's take a look at what happens when we increase the vibrance in comparison to the saturation:
 Left/Top: Edited Saturation (+50) // Right/Bottom: Edited Vibrance (+50)
As you can see above, increasing the vibrance does not give us the same effect as increasing the saturation. When we increase the saturation, you can see the orange of the rocks and the pink rooftops also increase in intensity. However, when we only adjust the vibrancy, these colors remain fairly close the unedited version. For your photos, you can use both sliders and see which one best suits your needs.
Brush Tool
One of the most powerful tools you can use in Lr is the Brush tool. This tools allows you to selectively apply Exposure, Contrast, Highlights and Shadows, and Saturation adjustments to your photos by "painting" them over certain areas of the photo. In other words, you can select particular areas of your photos (ex. eyes, mouth, a person) and make adjustments that only affect the brushed area. Below you can see where to locate the tool and part of the edits you can make using the brush tool:
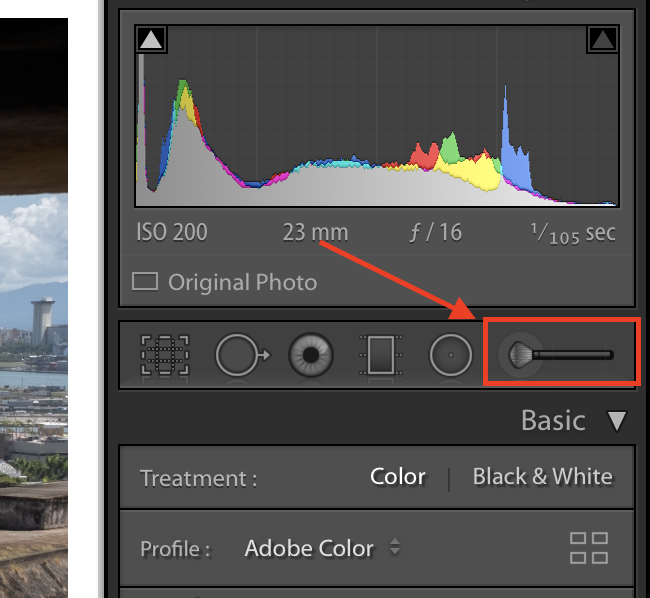
 Left/Top: The Brush tool is located below the Histogram // Right/Bottom: Once you click on the tool, a panel appears showing you the adjustments you can make
In the images below, I have brushed over and edited the foreground. You can see what you have brushed over by changing the color of the overlay, in this, I changed the overlay to red. Once I have brushed over everything I want, I change the overlay back to "None," and make my adjustments. In the example below, I decreased the Saturation completely, and as you can see, the area I brushed over is now desaturated.
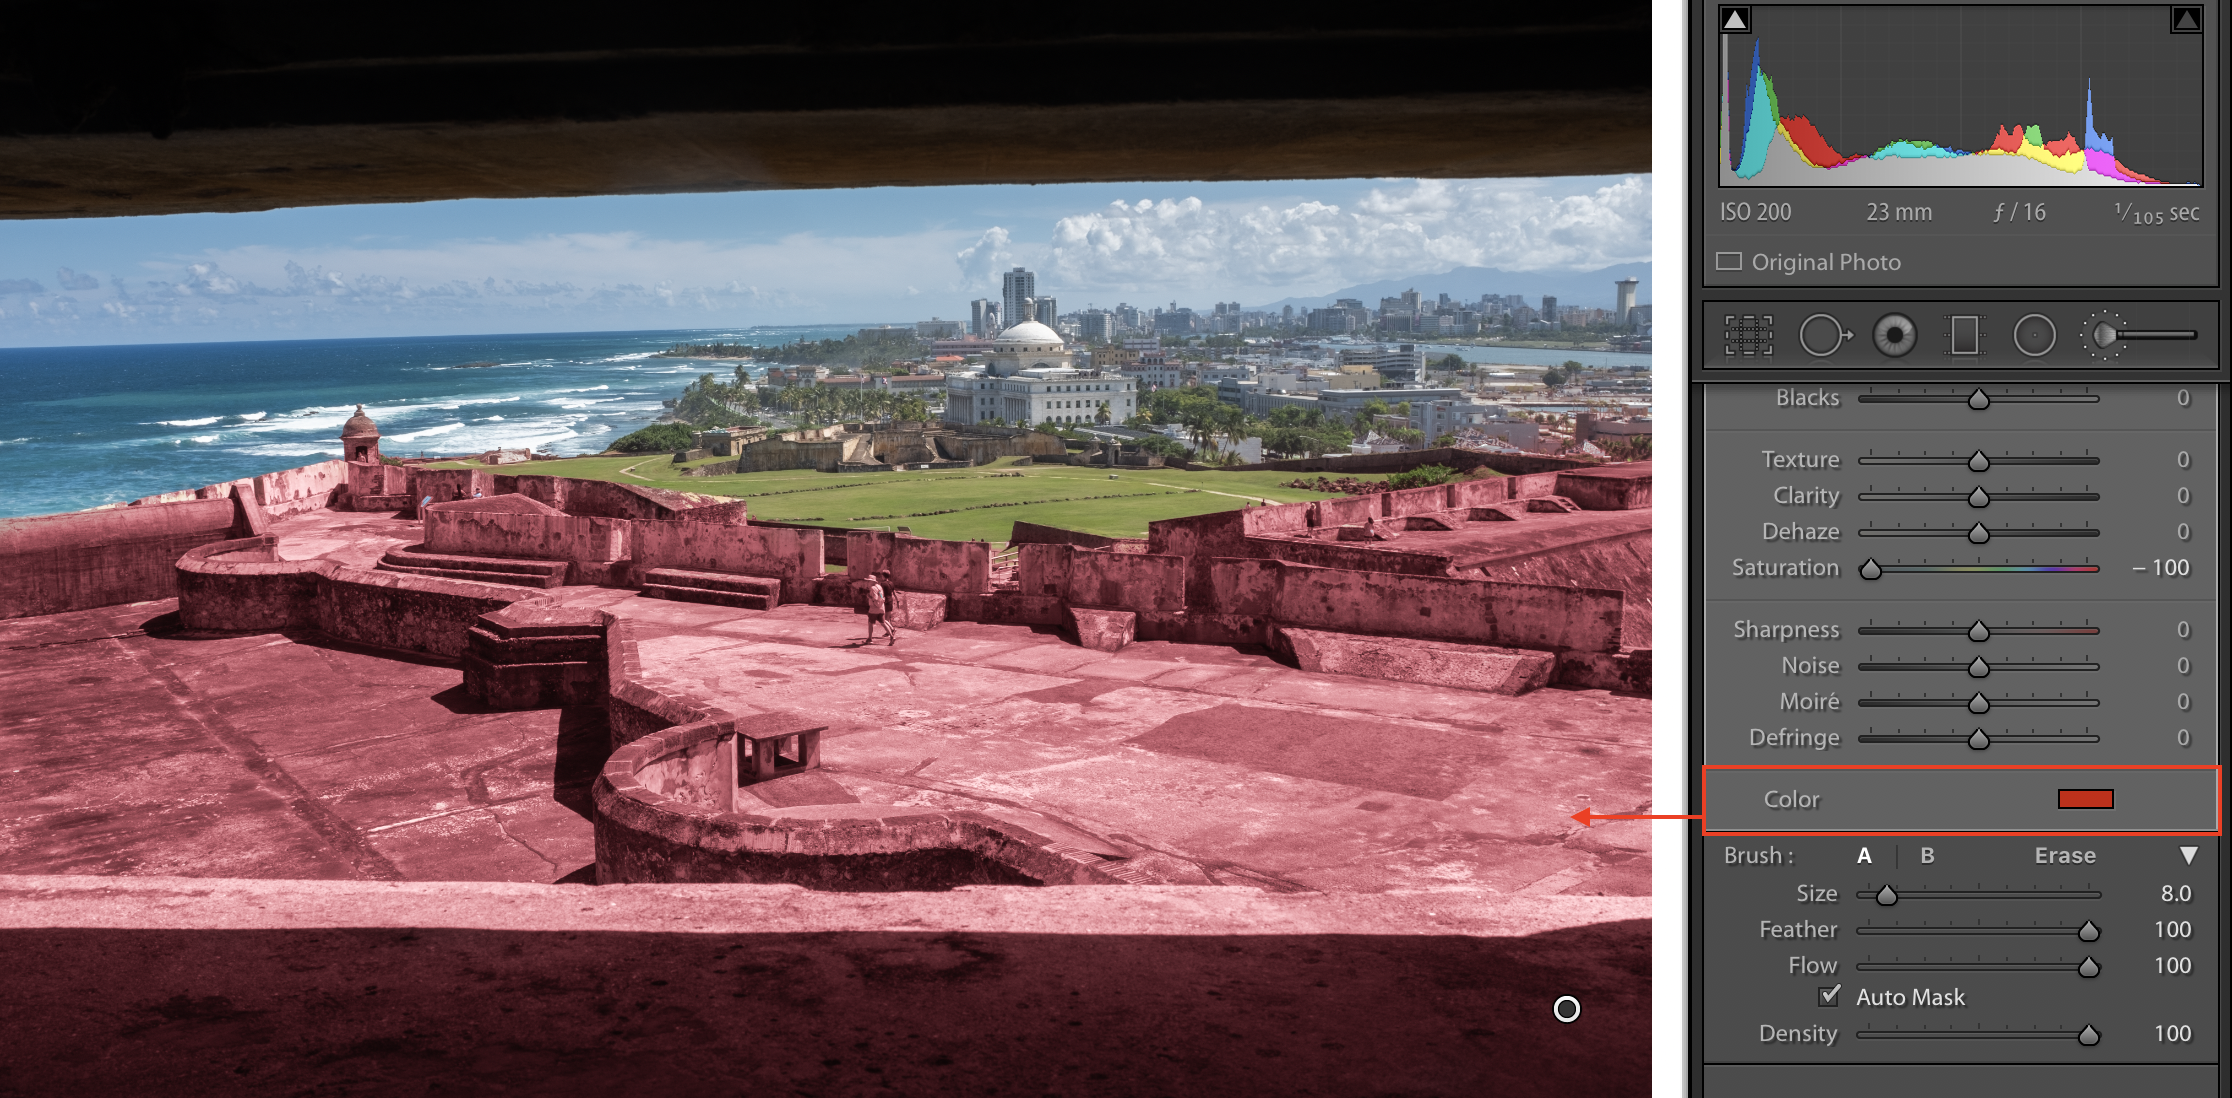
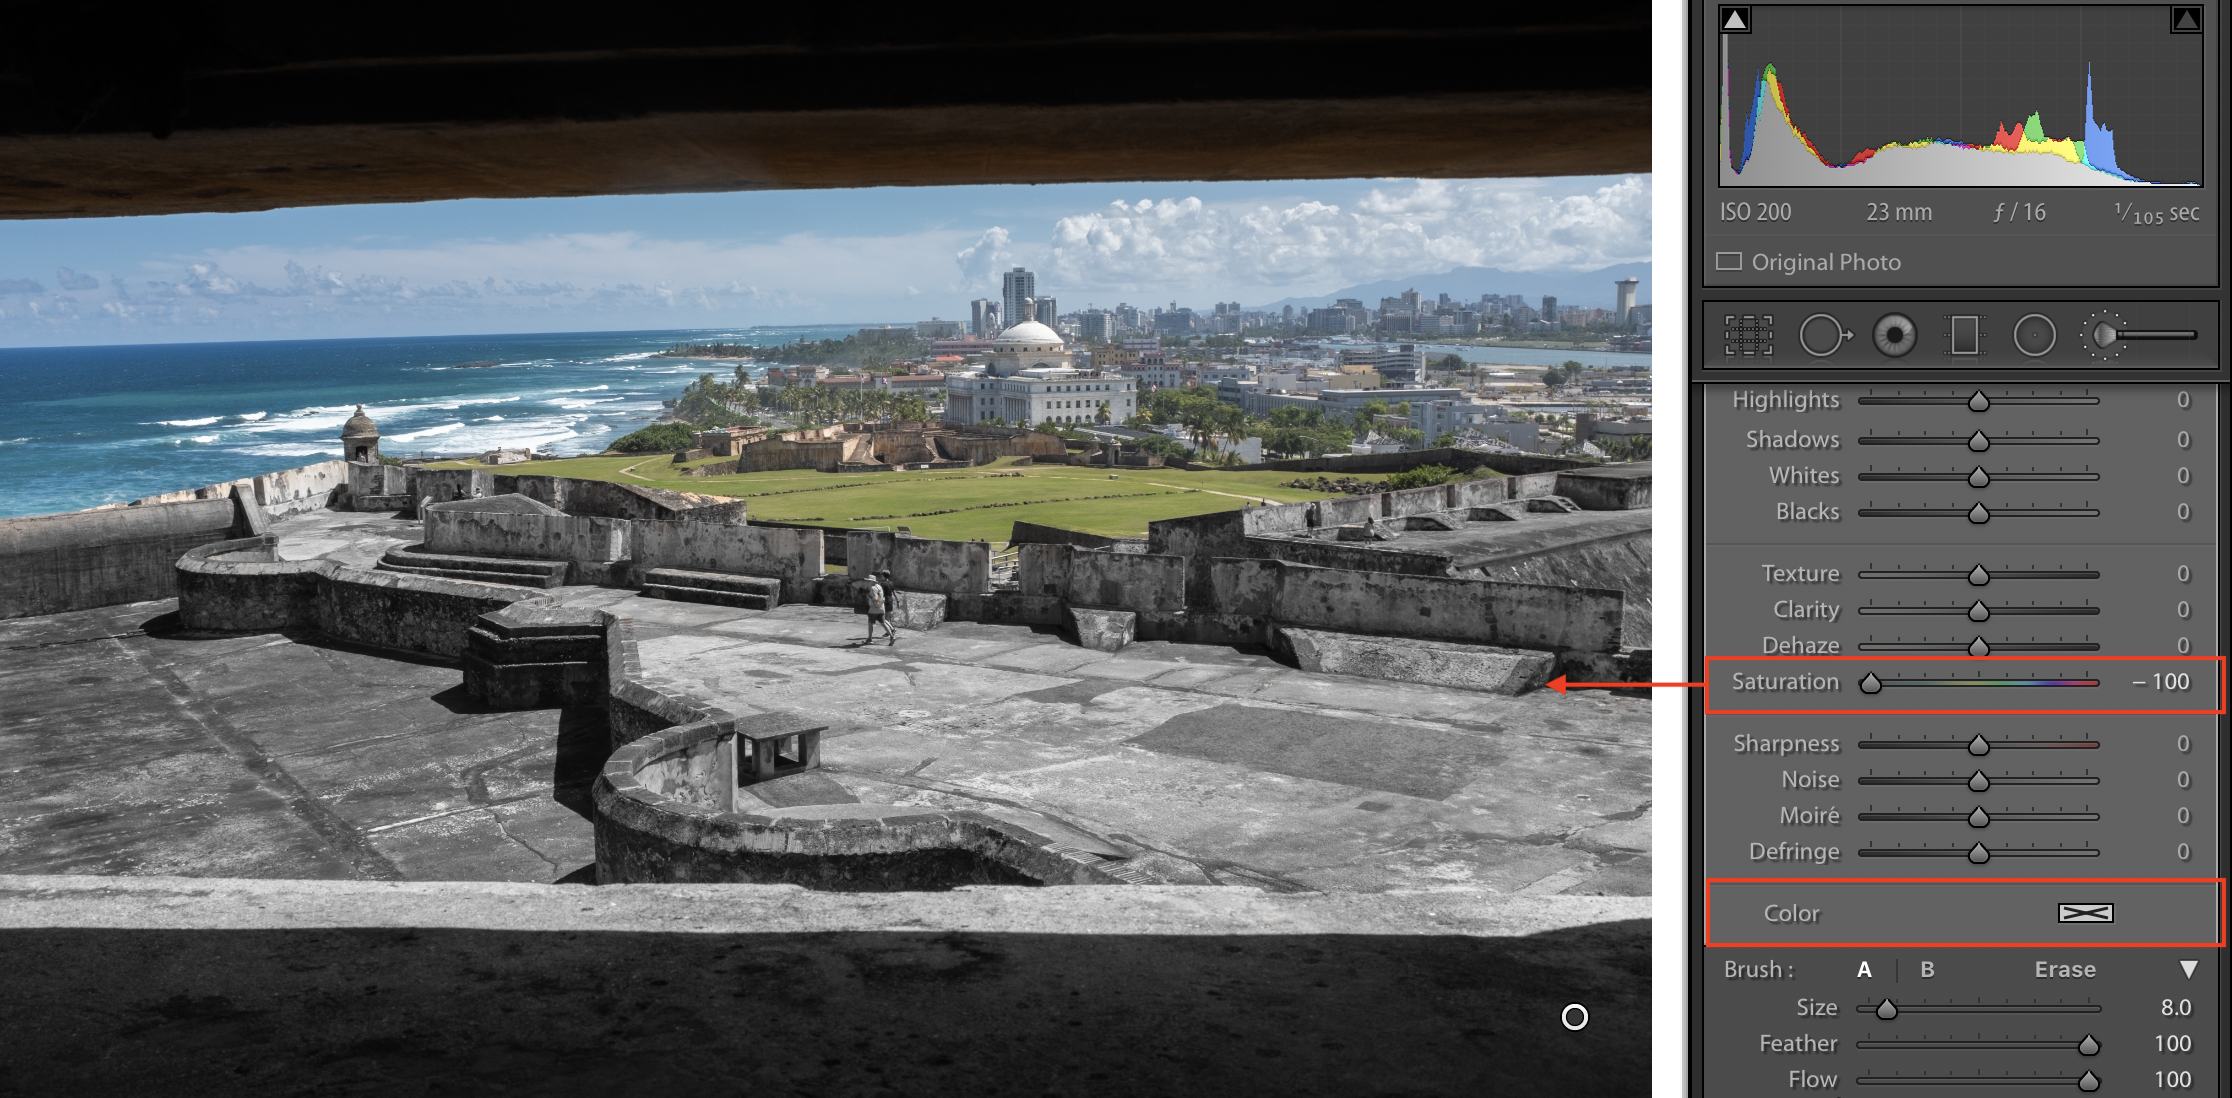 On the left/top, you can see how to select a color effect for your brush selection to see the affected area. On the right/bottom, I am applying a Saturation adjustment (-100) to the brushed area.
Additional Resources
As I first mentioned, Lightroom is a very powerful editing tool. There are many additional tools that I have not discussed, but below you will find some additional resources that may answer specific editing questions/needs you may have.
General Lightroom Tutorial for Beginners:
How to Make Color Corrections:
Additional Lr Tips: