Color Grading in Davinci resolve
This is by far Resolve's most well developed set of tools, it's what they entered the market with and has consistently held it's place as one of the go-to tools for work like this.
In video, color correction is not only about adjusting colors to reflect "true" interpretations of real colors, but also to generate style and bring unique Looks to your footage. You can make your footage heavily contrasted with deep blacks and sharp whites, wash it out for a dreamier look, green tinged to show the corruption of the story or lean heavily into contrasting base colors, popping the warmth of skintones against blue skies.

There are quite a few ways to fine-tune your footage with these tools, but the majority of them boil down to changing the values of two sets of three criteria:
- Red
- Green
- Blue
and
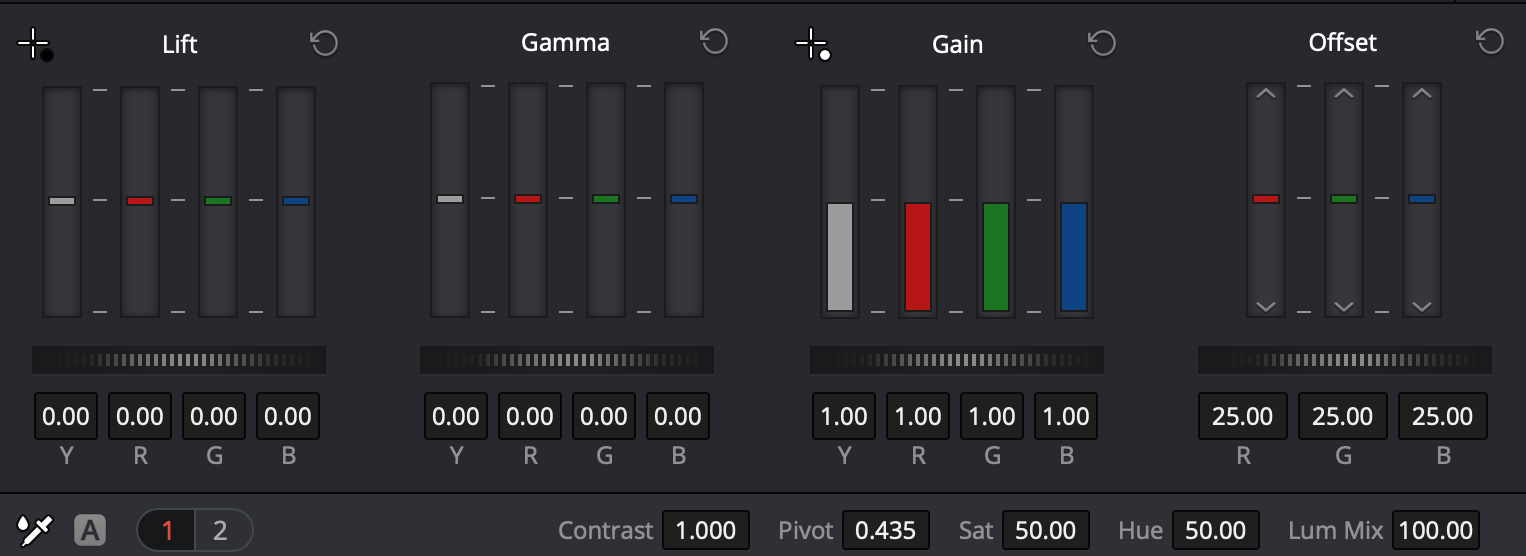
- Lift
- Gamma
- Gain
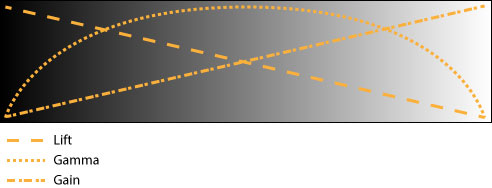
For example, you may want to correct the skintone of someone on screen that was exposed a little more blue than you'd want to be slightly more natural. In this case, you would decrease the Blue Gamma channel.

Or, if you wanted to increase the contrast of the entire image, you can globally increase the Gain and decrease the Lift.

There is a fourth form of Value, called Offset, this is a global change to all values equally.
If you have more questions about how Lift/Gamma/Gain are defined, this is an extremely well written article on the subject
The Tools
As you move around the Color tab, there's quite a few different ways to represent and control how color behaves. Most of them have very similar functions, mostly changing the levels of specific hues and values. The most common tools you'll use are these:
- Color wheels map color variations on four x/y graphs in which you can grab the center and focus it towards a specific color, raising the corresponding hue levels to match.

Color Bars
- Color bars operate similarly to the wheels, but isolate hue level mixing to individual base colors instead of mapping it onto a color wheel.
- This tool differs slightly from the other two. The line graph can be marked and moved in order to increase or decrease the values in that specific range of color. It can also be done for each, individual color, all of them together, and additionally you can identify a specific hue that is outside of RGB.

Nodes
The last, important bit of information you'll need before you jump into color corrections is where these changes go. Instead of working with Adobe's layer system, or applying the effects directly onto an individual clip, like you would in Final Cut Pro, Resolve works in "Nodes".

This is simply a system of housing for types of corrections you're applying. While you can apply all your corrections to a single node, it can help with accuracy and organization if you were to use one node for all of your color mixing, another for increasing contrast, and a third for applying a vignette. This way you can adjust the color of the shadows in your shot without adding that color to the circle of your vignette.
This also opens your options up to much more powerful applications of keying, split toning, masking, tracking and animating grades. Below are some guide links for slightly more advanced tools available in Resolve's Color tab.
- Node Types
- These will enable you to apply color grades with increasing levels of granularity.
- Keying using Qualifiers
- How to use Resolve's Qualifier tool to single out certain hues in your image and apply changes to them, or isolate them from global changes.
- Keyframing Color Grades
- Used in animating your color grade to change over time.