Importing Open Source Models into Unity
The What
Unity tends to be a little bit finicky on how it would like to import your models. Added to this, there isn't a singular format that has been normalized as the go-to option for delivering 3D models. So when you go to download a model from an open source site, you might find a combination of several different options. In this, I'm going to attempt to parse these options out and help you decide which one is best for you. Note: this is not a completely comprehensive list, and there are some file types out there that may not work with Unity, this just covers the vast majority of them.
These are hopefully all of the different formats you'll see listed:
- .fbx
- .obj
- .3ds
- .dae
- .max
- .blend
- .tga
- .png
- .zip
- .rar
- .mtl
This might seem like a dizzying list that automatically puts you off from the idea of using the model you've spent so much time hunting down, but really these can all be broken down into 3-4 categories: images, shapes, and directories, the fourth is more of a description that is used to define physical attributes of a shape.
Shape files
- .fbx
- .obj
- .3ds
- .dae
- .max
- .blend
These files are the most common, although they should always be matched with an image files, and sometimes a descriptor file. They are the actual 3D objects, themselves. Several of these file types have image files within them, so if you bring them into Blender, they'll import exactly as is. But Unity requires the images and objects to be separate files(if there is no image file to download, it can be instead extracted from the object file.)
Image files
- .tga
- .png
- .tiff
- .jpeg
These are really simple, flat image files. Often times they've been pre-folded like origami, so if you look at them, its possible they may just look like abstract shapes. This is what will "wrap" around your object files.
Directory files
- .zip(mac + pc)
- .rar(pc only)
These are simply containers meant to compress all the other files into an single, easily moveable file. Simply extract their contents with whatever utility your computer carries.
Descriptor files
- .mtl
An .mtl file carries information like how light is meant to refract off of the surface of this object, essentially information that is meant to "describe" this object.
The Why
All the information above is important, simply because as you're sifting through available 3D models, you'll run into almost every type of file listed. Often times, you won't have a choice on what kind of file available to you, so hopefully this guide will be able to orient you toward what to do for each situation.
For every download, you'll need two or three files.
- one shape file
- one image files
- and(if available) one descriptor file
or
- one directory file(this will most likely contain everything you need)
Unity always stores their materials separate from their objects, mostly this prevents duplication. If you have 20 of the same object in a scene, it'll be faster and smaller to refer to one image, than to have 20 separate images attached to those 20 duplicates.
The How

We've almost made it now, we're about to get that asset all squared away and your game up and running! Now you just need to take your object file and your image file(and if you have one, your descriptor file) and drag them from your file system into the Unity Project Panel.
From there, you should be able to see your 3d object and drag it into your scene. Its also possible that your object has a material at this point(frequently true with .fbx files), in which case, congratulations! You're set!
If you are seeing a dark grey object that's the right shape, but the wrong color, then don't worry, you just have a few more steps.

First of all, you'll need to extract the material, nagivate to the inspector tab with the object selected and click Select(if it doesn't look like the image below, skip this):

Next up, click the Material tab, and select "Extract Materials":

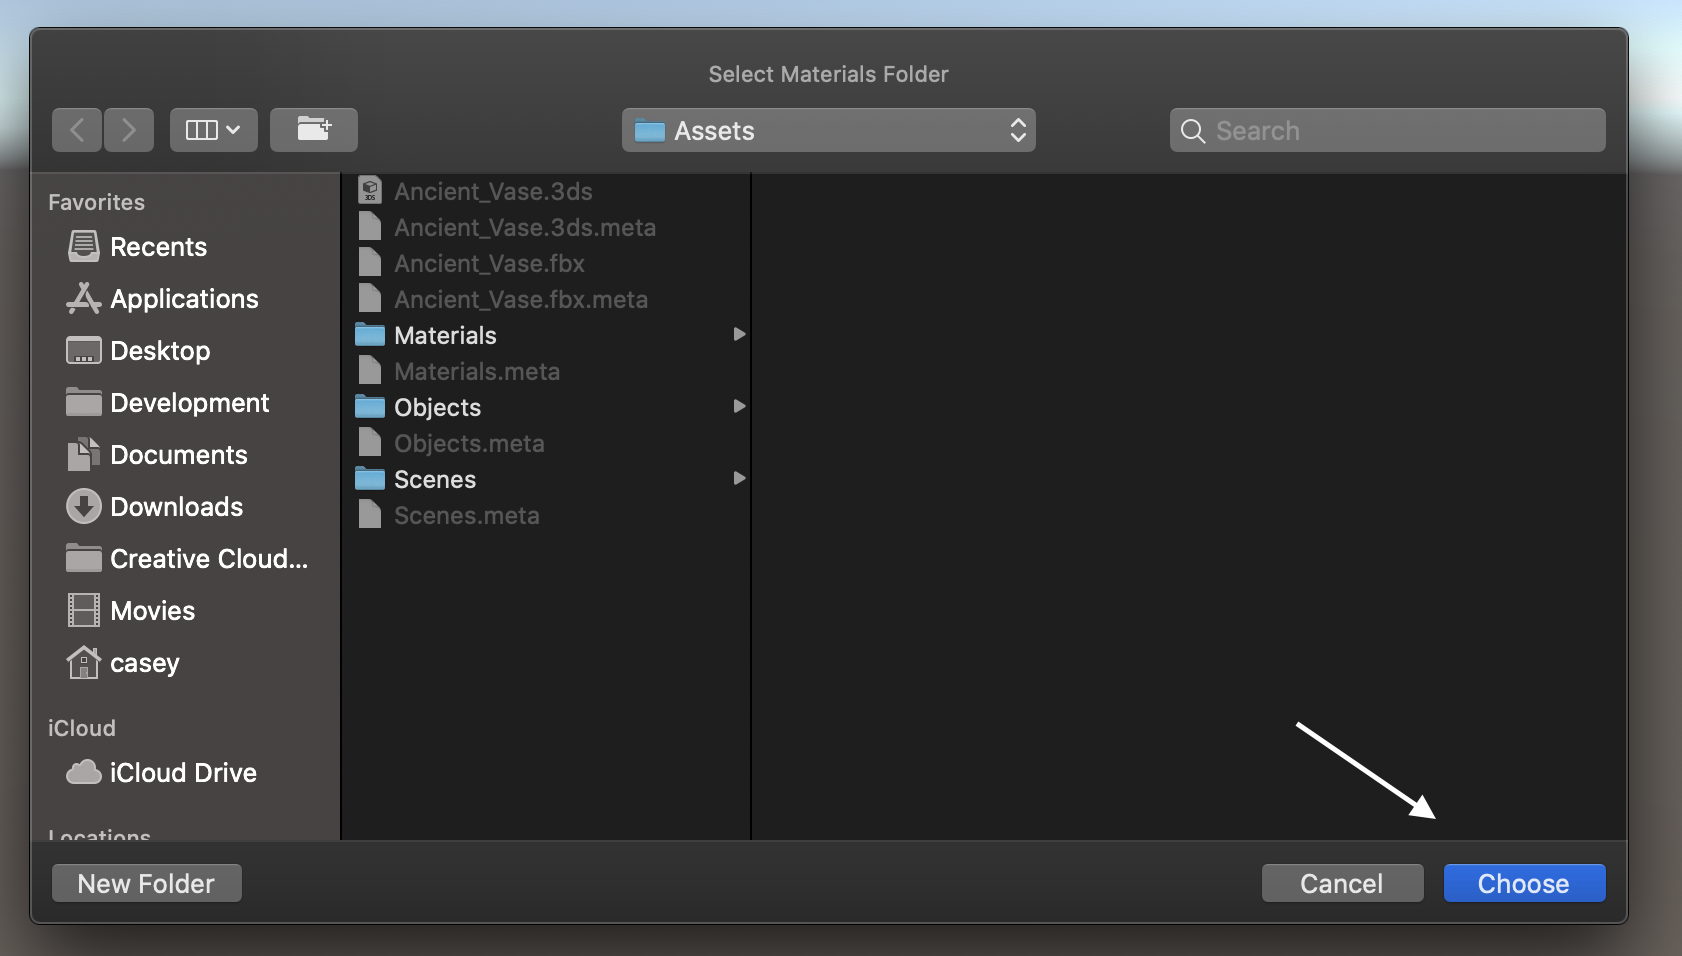
Just click "Choose", it's okay that nothing's selected:
Now your Material should be separate from the object and editable, go ahead and select it:

Navigate to the inspector and select the tiny little "o" next to "Albedo":

And finally, select the image that bears the same/similar name to your object!

From here on out, whenever you bring that object into your scene, it should retain the material information. If it doesn't, all you have to do is find that material in your Project panel and drag it over top of your object!
The How: pt II(because nothing is cut and dry)
Sometimes you won't actually see the round, grey material ball, instead you might find a blank shape file, along with one or a few image files. This is just as simple, just follow these steps!
Right click anywhere in the project pane and navigate to "Create" and select "Material"

This will give you that round, grey material ball, select that.
Over in the Inspector pane, select the little circle next to "Albedo" and choose your image!
You may be finished here. If you have more image files that might just look the same, but different colors, then what you have are texture maps or depth maps. If you apply the first image and it doesn't quite look right, you can always test the other images until it matches accurately. They aren't necessary for rendering, they just create a greater depth of realism. If you'd like to add them in, you can follow the last two steps(on the same new Material you made). Only this time, selecting "Depth map", "Normal map", or "Detail mask"