OBS for Zoom
OBS or "Open Broadcaster Software" allows you to accomplish many of the effects you see on the evening news, including adding videos, images, and text on top of your webcamvideo. When combined with Zoom it becomes a powerful tool for creating engaging presentations.
To connect OBS and Zoom we'll be loosely following the tutorial on this website.
Step 1: Download OBS
Download OBS and install it. You'll want to select the installer that matches the machine you'll be using. For me, that's Mac. Once it's downloaded, click the .dmg file that downloaded and when the installer window opens, drag the OBS.app icon into the Applications folder and drop it.
Step 2: Learn how to use OBS
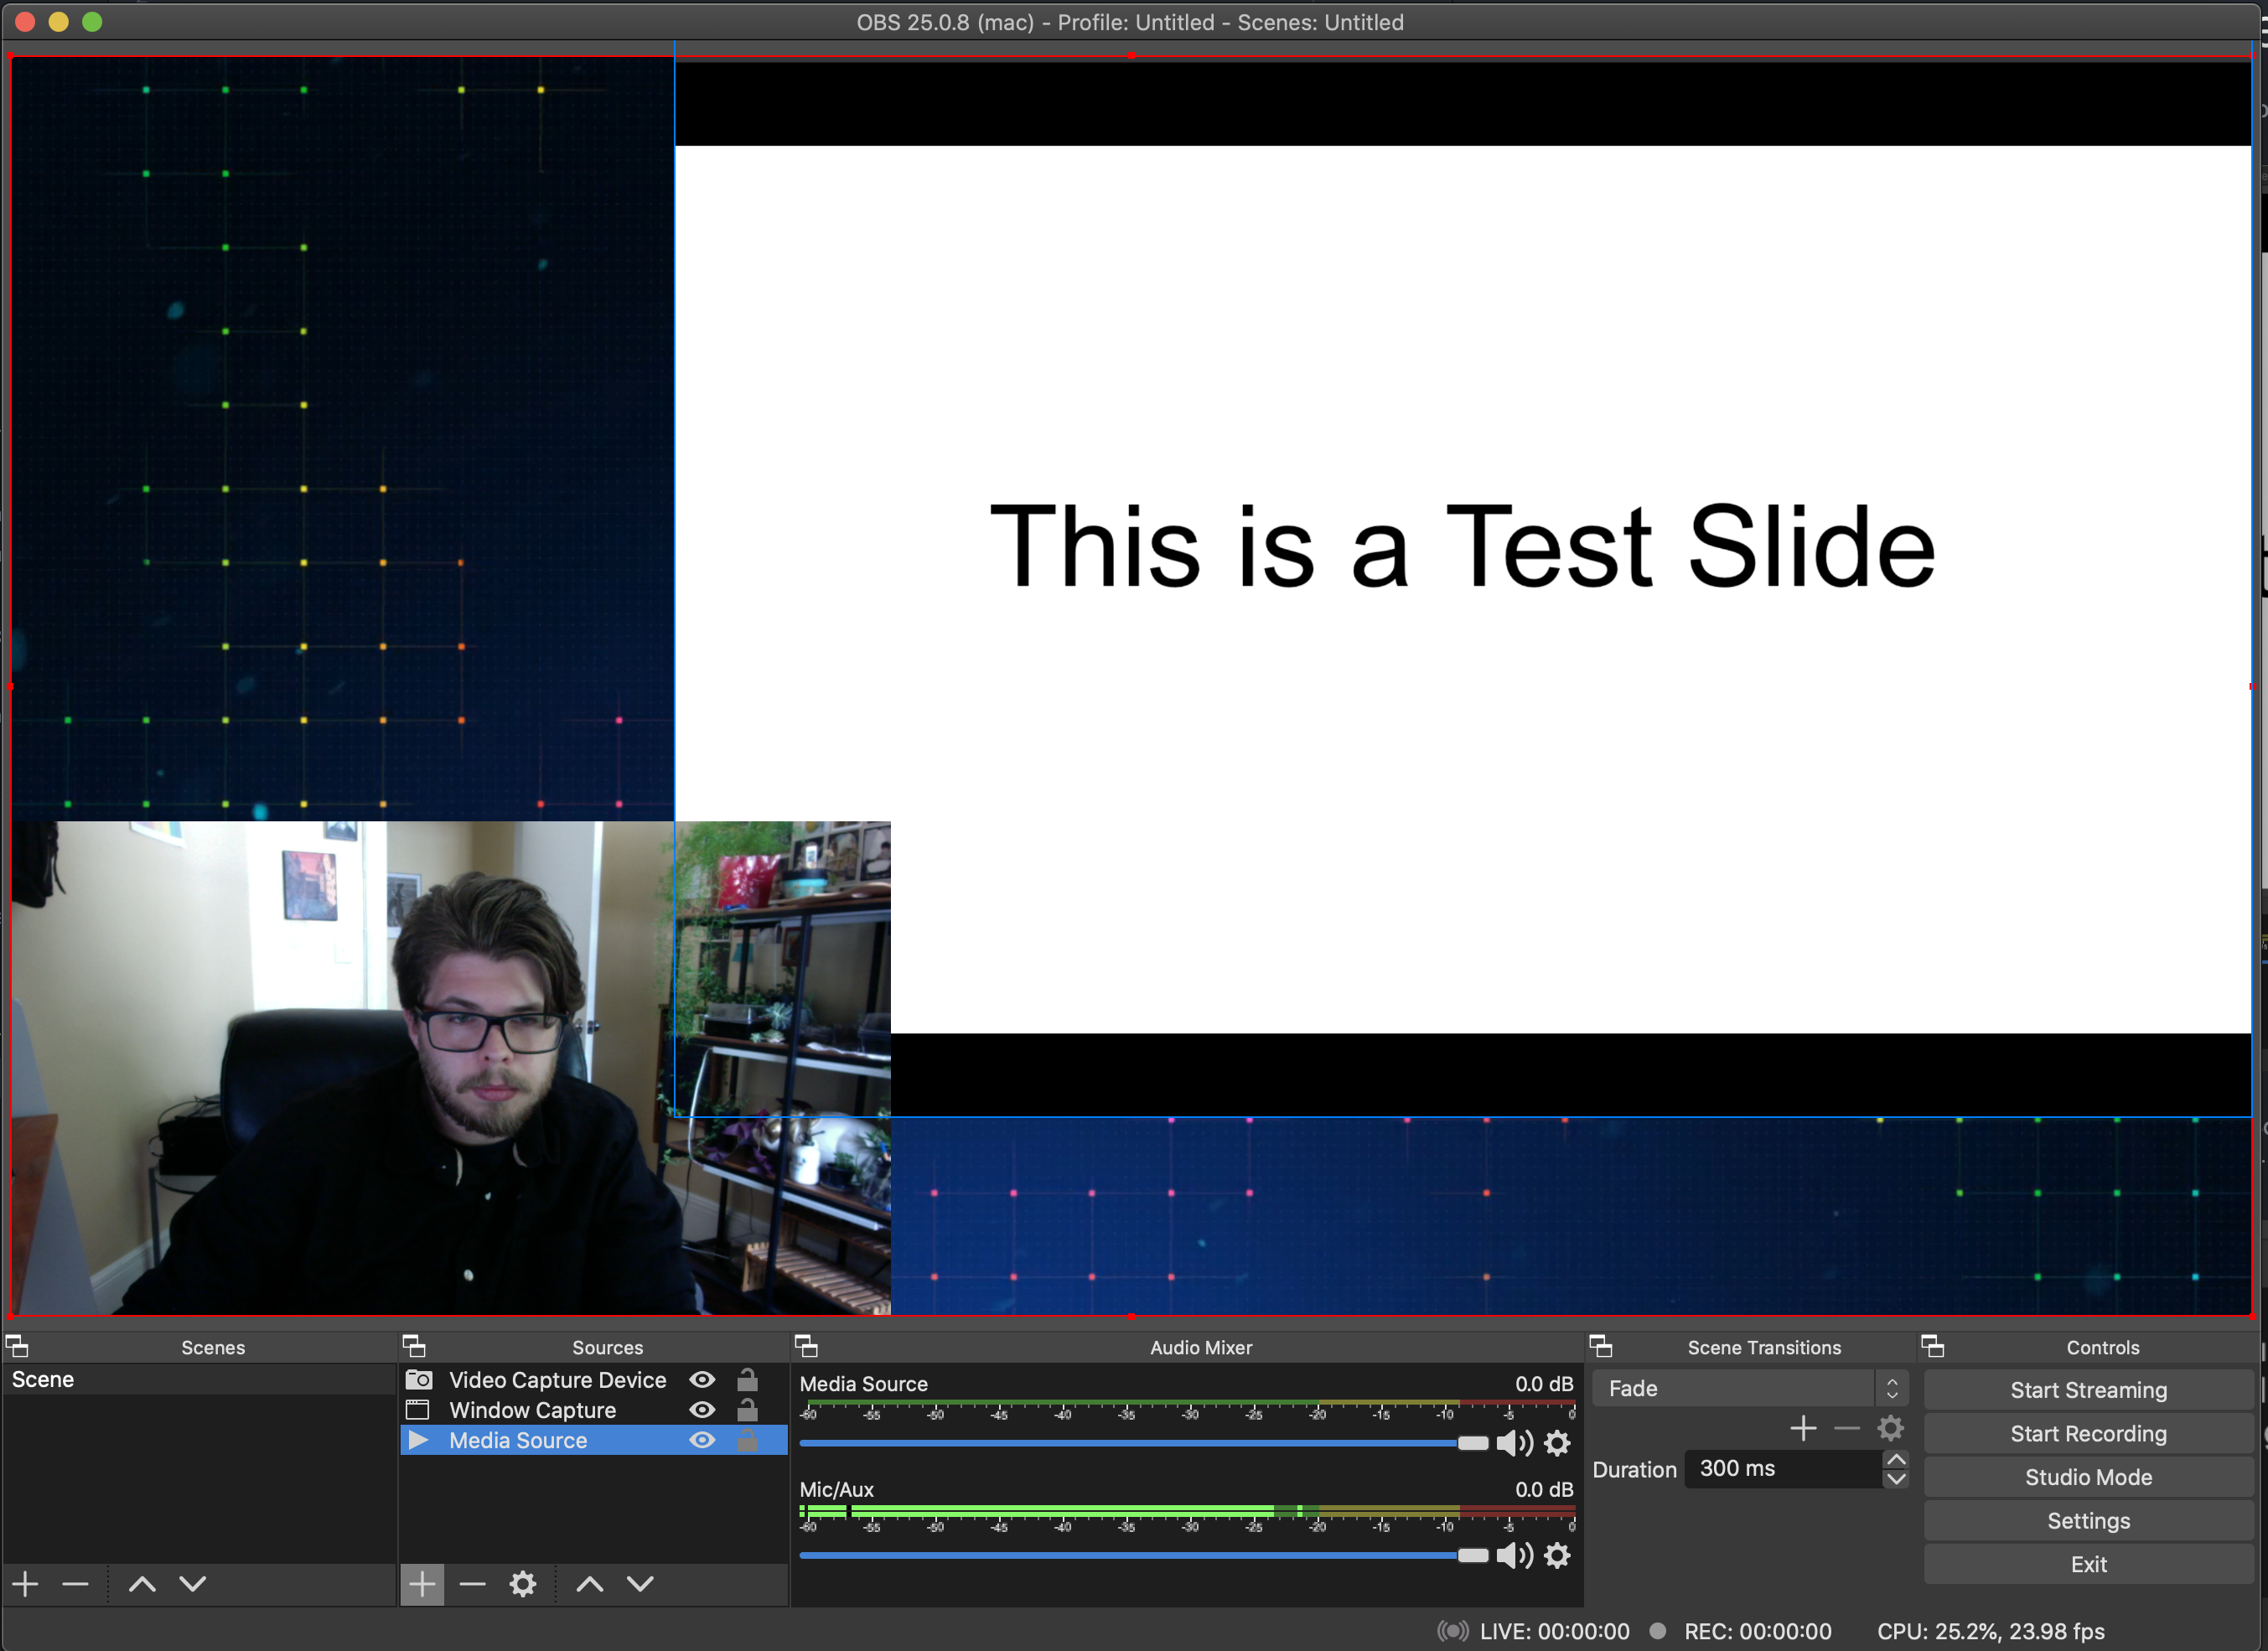
Scenes in OBS are essentially preset collections of settings that you can design before you start a stream/call/recording to quickly jump between. They can also easily be adjusted live.
I followed this tutorial to make my scenes in OBS:
They provide templates to work with on their website. Here are the ones we'll need:
But there are some more specific objectives we'd also like to explore
Namely, how you might project content like slides or video behind you, or cut back and forth seamlessly between yourself and your content. The beauty of OBS is that you have an incredible number of options on how you might do this.
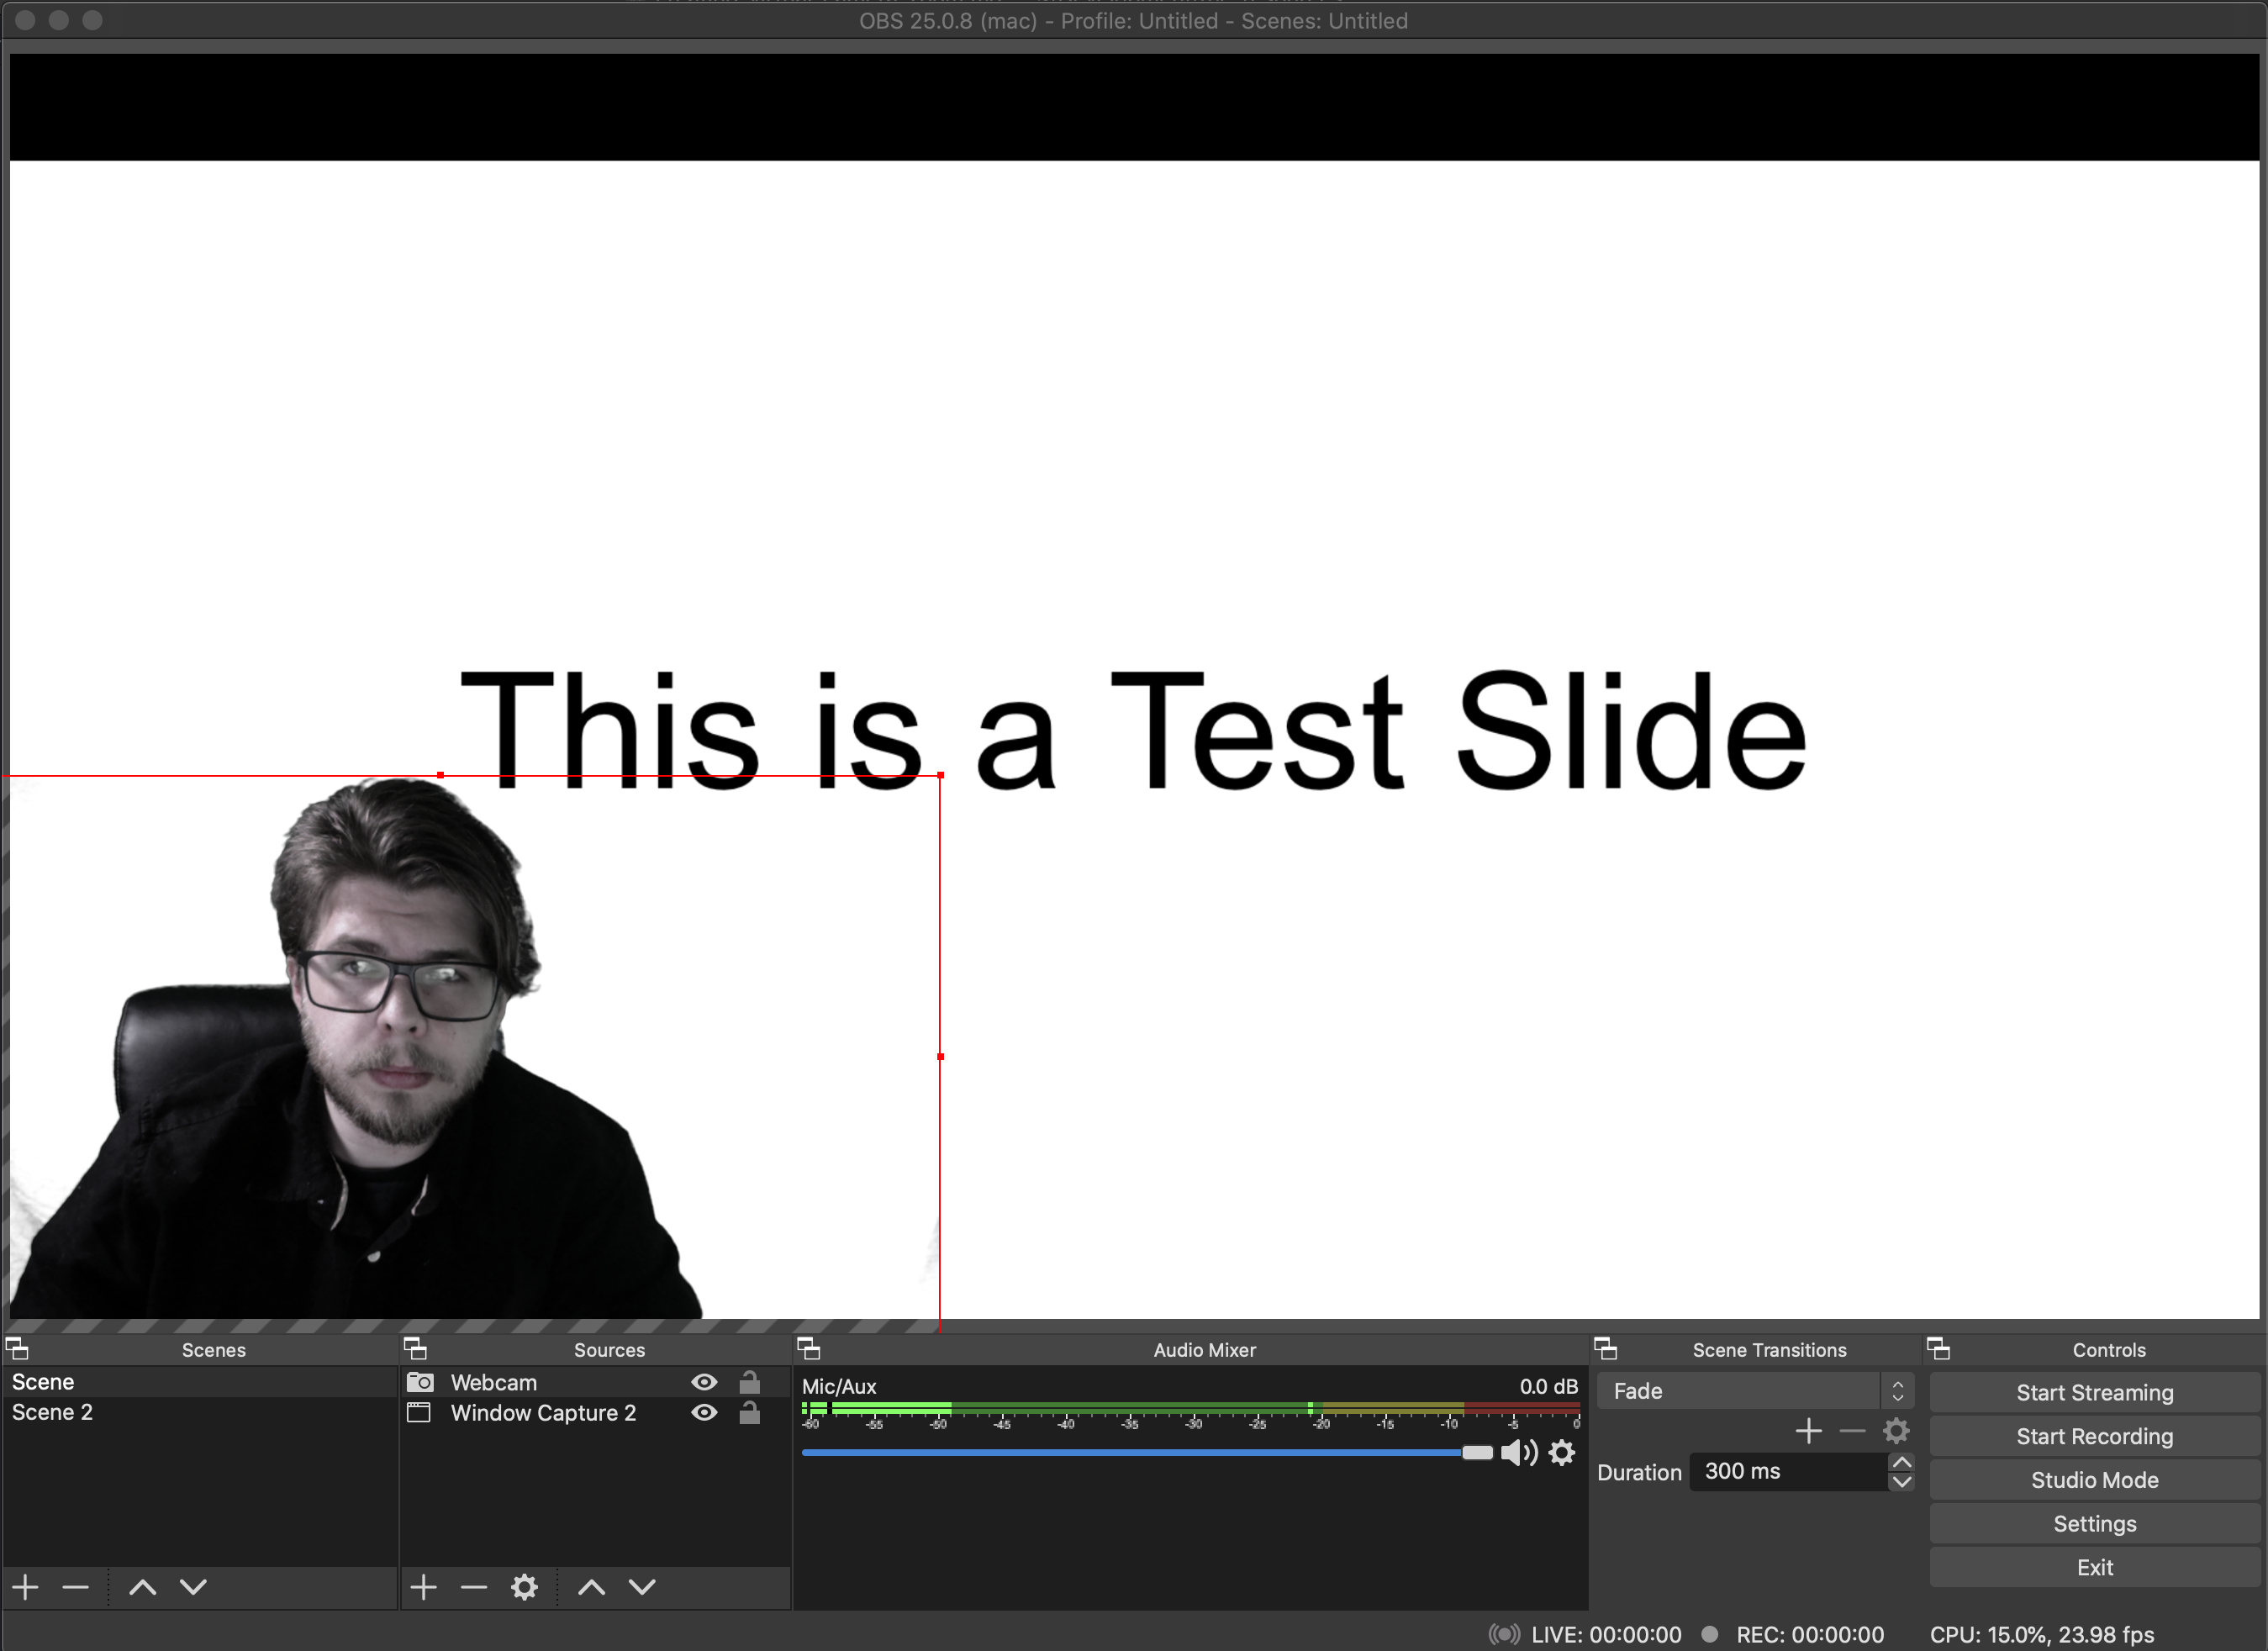
The one that is perhaps the most straight forward would be to panel your own webcam over top of your presentation, you can find a very quick and easy walkthrough on the steps to do this here
The second more closely represents the virtual background of Zoom, but does require a consistently colored backdrop behind you, preferably a green screen, but a colored wall would also work, so long as it is significantly dissimilar to your skin's tone. You can find the steps for this here
It's important to note that if you are using slides, OBS may be easier to use if you're using Google Slides rather than Powerpoint, as Google Slides has an easy to locate option to show your fullscreen within the browser window(rather than taking up your entire screen). -- this is called the Presenter View -- If Powerpoint is your tool of choice, you can find how to locate the windowed fullscreen option here.
Step 3: Install a Virtual Camera
We want Zoom to show off the fancy new scene we've created in OBS, but Zoom is configured to only look for webcam inputs. To overcome this, we'll have to install a "virtual camera" that will display our OBS scene.
We'll be using a virtual camera developed by John Boiles on Github.
Download the latest .pkg installer on the Releases page. The current script as I'm writing this is called
obs-mac-virtualcam-3ca8f62-v1.2.0.pkg.Run the .pkg installer (entering your password when required).
If you're already running OBS, make sure to restart it.
To start the virtual camera in OBS, in OBS go to Tools→Start Virtual Camera.
Now that you've got your virtual camera running, you'll need to make Zoom accept it as a video feed. In fancy technical terms, you'll have to use sudo to give it permission to allow DAL plugins. More on that here.
To do this, you'll have to open Terminal (press
command+spaceto open spotlight search, then type "terminal" and hit return) and paste this:sudo codesign -f -s - /Applications/zoom.us.appand hit enter.
Step 4: Present in Zoom
Open up Zoom and select OBS Virtual Camera as your camera source by clicking the ^ next to the "Start Video" button.
You'll need to change your slides in whatever program you're using to display them.